Friday, August 30, 2013

Fudgy Chocolate Almond Brownie


Basically, for those who are a newbie in baking like me, you may ask what is exactly the difference between a brownie and a cake?  Well to start it off, a brownie is a cross between a cake and a cookie.  To put it simply, it is flatter, denser and fudgier as compared to a cake which is taller and fluffier.

Brownies comes in a variety of forms, depending on its density.  Primarily, they are either the cakey type or the fudgy type.  Again, it all depends on personal preference.   For me?  I would choose the latter, and the gooier, the better.

Interestingly, there are some myths leading to the creation of this version of cake dessert. The first, that a chef accidentally added melted chocolate to biscuit dough.  The second, a cook forgot to add flour to the batter.  And the third, also the most popular belief, that a housewife who was baking a chocolate cake forgot to add baking powder.  When her cake did not rise, instead of tossing it out, she went on to serve the flat pieces to her guests.  This became a beloved treat of today.  Whatever may be the case, all three myths have lead to the 'birth' of this sweetie which eventually gained its very own popularity among cake lovers.

So, based on these myths, they sort of self-explain the distinct texture of a brownie: 

1. The higher ratio of butter to flour - makes the dessert
     fudgier and denser. 
2. The absence of baking powder - makes the cake flat.
3. The higher ratio of sugar used - makes the brownie gooier. 
4. The extra melted chocolate - makes it devilishly and sinfully chocolatey

This is my first time baking a brownie.  Personally, I find baking this treat relatively simple as compared to a cake.  Thank God, for once I don't have to bother whether the mixture is over beaten or under beaten.  I also need not care whether the ingredients are at room temperature or not, or whether the eggs are soft peak, stiff peak, hard peak or no peak!  The best part is, there is no mixer required, be it the stand one or the hand one.  It's pretty straightforward, just add and mix.

I adapted this recipe from Wendy of Table for 2....or more.  I deliberately added 20g of coffee powder to give the dessert the extra kick.  Indeed, the coffee gave a tinge of sweet-bitter taste.  Generally, I am quite pleased (though not totally satisfied) with the outcome considering this is my first time trying my hands out at this bake.  The only setback is the whole thing was not dark, gooey, fudgy and moist enough. 

After making the cake, I went on to scour through the net about the perfect brownie and incidentally this blog here from Eva Bakes piqued my interest.  It seems that she has made quite a few variations of brownies and all of them looked so amazingly tempting - dark, moist, gooey and fudgy! 

Anyway, here's the recipe I used.....

The Recipe:
250gm dark chocolate
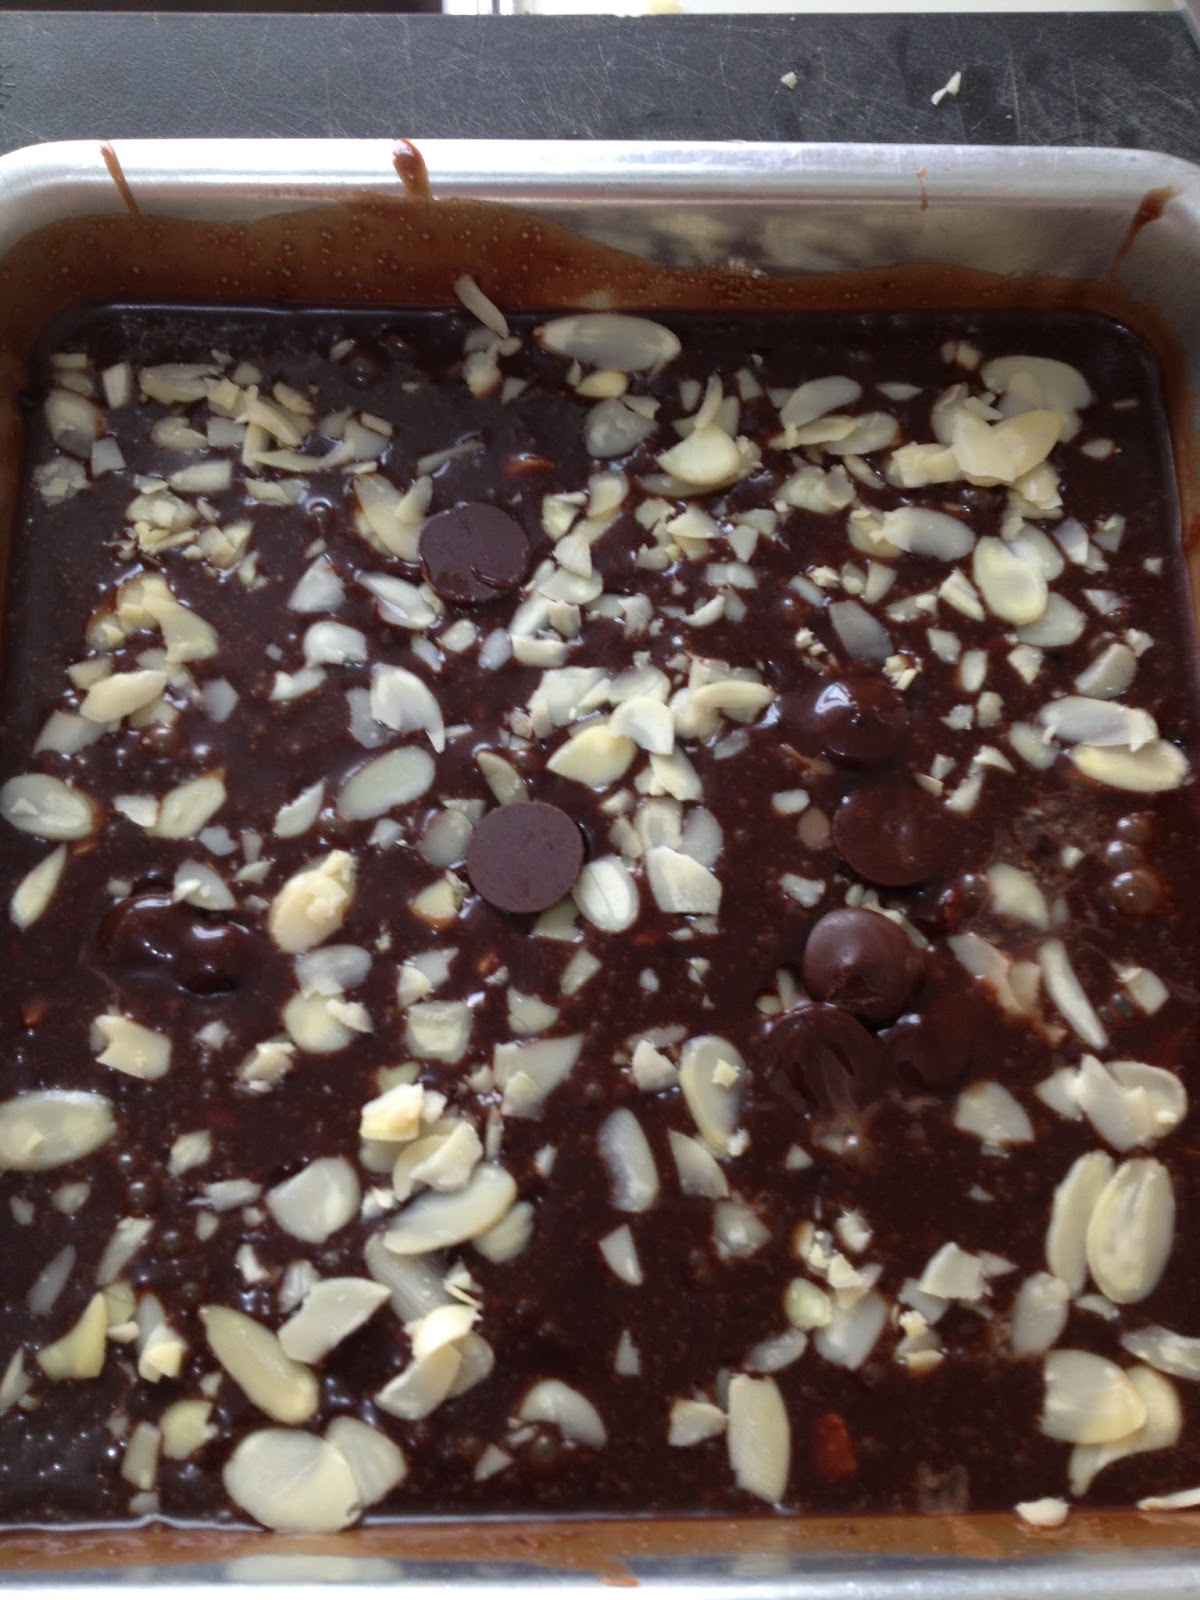
100gm butter
100gm sugar (I find it a little tad too sweet, so pls reduce accordingly)
1 tsp vanilla extract
20g coffee/espresso powder
3 eggs
60gm all purpose flour
100gm chocolate chips
100gm white chocolate chips (I do not have any, so I use the chocolate one, so altogether 200g of chocolate chips)
Small handful of almond (optional)

Method:
1. Preheat oven at 140/160C. Line an 8 inch shallow
    square pan.
2. Place dark chocolate and butter into a mixing bowl.
    Place mixing bowl over another bowl of hot water and let the butter and chocolate melt,
    stirring gently.
3. Remove mixing bowl from hot water and mix in sugar, vanilla extract and coffee powder.
4. Put in eggs and mix.
5. Sift in flour and mix.
6. Put in 2/3 of both choc chips and nuts and mix.
7. Pour batter into pan and sprinkle balance of almond nuts and choc chips.
8. Bake for 35- 40 minutes or until skewer comes out clean.
 

Happy Trying!!

Saturday, August 24, 2013

Melt-in-the-mouth Pineapple Tarts - Enclosed Version


Barely two months after I last blog about pineapple tarts, here I come again, with another version of this glorious sweetie!  This time round, it is the enclosed type.

Having grown  up eating loads and loads of homemade traditional Nyonya pineapple tarts which characteristically has its filling exposed, this bull-headed soul was just too dogged to recognize any other variations of the tart.  He was just too arrogant to even try them and to him, as though the open type was the ONLY one existed in this whole wide world. 

Thus, it comes to no surprise if I say this is my first time eating this version of pineapple tarts, apart from the Taiwanese Pineapple Cake which coincidentally also has its filling enclosed.

Taiwan Pineapple Cake
Malaysia Pineapple Balls
Thanks to Sonia of Nasi Lemak Lover, whose excellent and insightful posting on the enclosed version of the tart finally tamed down my arrogance and brought me a step closer into the realm of pineapple world.

What drew me into reading her posting and experimenting the tarts myself were basically because of these two factors:

  a) it is super-duper straightforward which only calls for four ingredients, yes ONLY 4, and they 
      are bu---, con----, f----- and e---.

  b) it is the best melt-in-the-mouth pineapple tart version though you may have your melt-in-
      the-mouth recipe

Huh?? Sure or not, Sonia??  Well, after taking my first bite, I would have to take my hat off.  You are absolutely correct!  The tarts are freaking melty!  Unquestionably, it is by far the best that I have ever tasted, too!


So, here it is, the secret reveals.....

Ingredients:

350g butter
100g condensed milk or sweetened creamer
510 plain flour
2 egg yolks

700g pineapple filling (homemade or store-bought).
You may find the recipe in my previous post here if you intend to make your own.

1 egg yolk + 1 tsp milk, for egg wash

Method:
1. Cream butter and condensed milk till light.
2. Add in egg yolk one at a time, and beat until combine.
3. Mix in flour to make a dough. Make sure it's not sticky.
4. Refrigerate for about 30 minutes.
5. Meanwhile, roll pineapple filling into balls
6. Flatten a piece of dough and place a ball of the rolled pineapple 
    filling in the middle.  Bring the edges of the dough together and 
    press lightly to seal.  Gently roll the ball on the surface of your
    table top so that the surface of the ball is smooth and neat.
7. Glaze the rolled balls with egg wash.
8. Bake in the preheated oven at 165C (fan forced) for about
    20 mins or till golden brown.
9. Cool completely before storing.


Happy baking!

Friday, August 9, 2013

Raisin-Almond-Orange Streusel Cake


This is my first time baking a streusel cake.  Obviously, the word itself was so alien to me when I first heard it.  It sounded so English that I thought it was some kind of a candy or even a name of a branded shoe. Or could it a type of gardening tool or some dog breed? Oh my God! There goes my apish ignorance!

I bet that most of us have eaten a streusel or at a very least seen it before but not knowing what it is called.  After some read-ups, I came to know that basically streusel is a crumblike topping for coffee cakes and rich breads, consisting of flour, sugar, butter, cinnamon, and sometimes chopped nutmeats.  Streusel is indeed a German word which means 'something scattered or sprinkled'.  True enough, this sugary crumbs are generously scattered on top of the cake giving the whole cake a tinge of sweetness.  If you have weakness for butter, then this little something will without fail pamper your taste buds to the max. 

Surprisingly, my son who normally has no craving for cakes sort of like this bake a lot.  Personally, I find this cake so-so as I do not like the sourish zing from the raisins.  Probably, I have over-soaked the raisins causing it to lose its sweetness.  The only thing that has made up for the flaw is the streusel topping.  The buttery and sugary crunch from the topping is simply satisfying and indeed completes everything. 

This cake will be perfect to go with a cuppa hot coffee on a hot afternoon in a private garden enjoyed together with a bunch of close friends or family members.  Aaahhh.....heavenly! 


For those who want to give this dessert a shot, here's the secret......

The Recipe

A) Batter
     55g unsalted butter, at room temperature
     100g brown sugar (1/2 cup)
     1 large egg, at room temperature
     125g all-purpose flour (1 cup)
     1/8 teaspoon salt
     1 tsp baking powder
     1/2 cup orange juice
     1/2 cup raisins, soaked and drained
     small handful almond flakes


B) Streusel
      60g all-purpose flour (1/2 cup)
      55g cold, unsalted butter, chopped into small pieces
      55g caster sugar (1/4 cup)

Method:

Preheat your oven at 175C degrees and butter a 8-inch square pan.

In a medium bowl, combine the flour, baking powder, and salt and stir to blend. 

In another, larger bowl, beat the sugar and butter together until they become creamy and fluffy. Add the egg and vanilla extract and beat well. 

Add half of the flour mix into the egg-butter-sugar mix, bit well, then add half the orange juice and beat again.

Do the same with the remaining half flour mix and orange juice (and zest if you are using it). Beat the mixture until it is smooth. Stir in the raisins. Spread the mixture evenly in the prepared pan.

Make the Streusel
In a small bowl combine the flour, sugar, butter pieces and mix it with your fingers until it becomes crumbly.

Sprinkle evenly over the batter in the pan and stud with the almond flakes. 

Bake the cake for 20-30 minutes or until it is golden brown. Test with a toothpick to see if it is ready, if the toothpick comes out clean it is ready. 

Let it cool in the pan for 10 minutes and then unmold and serve warm or at room temperature.


Enjoy!!