Showing posts with label Baking. Show all posts

Saturday, August 2, 2014

Soft Fluffy Orange Cake


I have been making orange cakes several times and this recipe is by far the best and the most satisfying one.

I whipped this cake when we had our sibling get-together session on the first day of Hari Raya Aidilfitri.  We have not been meeting each other for almost three months. Since the meet up was arranged during tea time at mom's house, I was thinking that perhaps a simple homemade cake would just go perfect with a cup of hot coffee.

Coincidentally, I stumbled upon this amazing recipe on Google+ while waiting for my sister's call.  I could not exactly recall what attracted me to this recipe but all I knew, this could be THE  recipe I was looking for and before I could say anything further, I was already in the kitchen whipping my magic.

Thankfully, everything turned out well and I was absolutely pleased with the results.  The cake rose and baked beautifully in the oven.  For the first time ever, in my baking history - No domed shape!  No cracked top!  No over-burned top!  What came out was - a soft, moist and fluffy little sweet treat, all ready to wow me and the entire family.
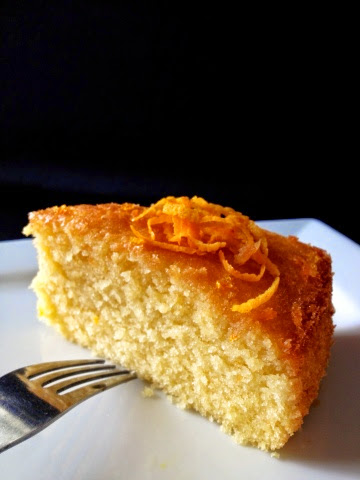

True enough, the cake was a winner that afternoon.  In fact, it's always a bliss to eat a cake while it's still warm, soft and fluffy.  That could be the reason everyone was going around ooh and ahh and subsequently complementing me and my wife.  Wait a minute, my WIFE?  What has she got to do with the cake?  Actually, what they meant was....."you are damn lucky to have such an amazing husband."  LOL!  Well, to me it was THE RECIPE that made me so-called AMAZING, okay!  I - JUST - FOLLOW! 

So, my dear friends, if you wanna be as AMAZING as I am, then FOLLOW the recipe below....(hehehe!)


The Recipe:
(adapted from Monica of  Lick The Bowl Good)

Note : For this recipe, I have reduced the amount of sugar both in the cake and in the orange glaze.  I find the sugar used in the orange glaze was a little crazy.

Cake:
  • 1 cup (2 sticks/about 230g) unsalted butter, room temp.
  • 1 cup granulated sugar (I reduced to 3/4 cup)
  • 4 eggs, room temp.
  • 1 1/2 tsp. grated orange zest
  • 2 cups all purpose flour
  • 1 Tbsp. baking powder
  • 1 tsp. salt
  • 7 Tbsp. fresh squeezed orange juice
Glaze:
  • 2 cups powdered sugar (I reduced to 1 cup)
  • 3 Tbsp. fresh squeezed orange juice
  • 1 tsp orange zest
The Method:
  1. Heat the oven to 350F. Butter a 9-inch cake pan and line the bottom with parchment paper. 
  2. Then butter the paper and set aside.
  3. Cream the butter and sugar well, until it is very pale and thick - this will take quite a while.
  4. Add the eggs one by one, beating well after each addition, then add the zest. Add the flour, baking powder and salt all at once, and beat well, then slowly add the orange juice until it is incorporated.
  5. Pour the batter into the prepared cake tin, and bake for 35-40 minutes - or until an inserted skewer comes out clean (slow is best, so don' t be afraid to cook it longer. If it starts to brown too much on the top, cover loosely with a sheet of buttered foil.)
  6. Allow cake to cool in pan for 15-20 minutes on a wire rack. Then invert onto a plate, remove the parchment paper and allow to cool completely before glazing.
  7. To make the icing, stir the orange juice into the icing sugar until you have the right spreading consistency. 
  8. Pour the icing onto the cake and spread with a spatula or butter knife, allowing the icing to drip down the sides of the cake.
  9. Leave the icing to set before cutting the cake into wedges or storing in an airtight container.

NOTE (from Monica) : I thought the glaze was rather sweet and needed more orange flavor so I suggest adding some grated orange zest to the glaze for more intense flavor.


Wednesday, June 18, 2014

Chocolate Caramel Banana Upside-down Cake

This recipe is definitely a keeper.   If you love caramel, banana and chocolate just exactly like I do, then this cake is seriously for you.  Bring this to any potluck gathering and I am positively sure this secret indulgence will be a crowd pleaser.

To me, chocolate especially dark rich chocolate just goes perfectly well with any ripe bananas.  These two ingredients really make good cakes as the flavour and aroma are just crazy.  More so, when the cake is drizzled with a slosh of caramel, oh my goodness gracious, the whole thing is just devilishly sublime.

Anyway, this recipe came to me by chance.  I was scouring around the net for a bak chang (Chinese dumpling) recipe when I accidentally spotted this secret.  I must thank Joyce of Kitchen Flavours for sharing this wonderful treat.  I strongly encourage that you visit her post here to view some close-up photos.  Indeed, looking at the photos was sufficient enough to make me go bananas.  I had to divert my ravenous eyes away (eerr from my bak chang recipe searching) and subsequently clicked in and explored the secret further.


I am pleased that I baked this cake as it helps to add on to my favourite and to-die-for collection of cake recipes.  The cake is chocolaty rich, moist and more importantly not overly sweet despite the caramel drizzle.  Wife likes it a lot and daughter loves it dearly too! But to me, it would have been even more perfect if I had added in some mashed bananas and chocolate chips into the cake batter, making the cake look even moister and taste more flavorsome.  Eerm, definitely going to try this the next round.

That's it, here you go, the recipe...  

Chocolate Caramel Banana Upside-Down Cake
(adapted from Joyce of "Kitchen Flavours")
Serves 8
For The Topping :
1/2 cup (1 stick) unsalted butter
3/4 cup packed light brown sugar
3 ripe bananas, peeled and cut into 1/4-inch thick slices


For The Cake :
3/4 cup plus 2 tablespoons unbleached all-purpose flour
6 tablespoons cocoa powder, sifted
3/4 teaspoon baking soda
1/4 teaspoon salt
6 tablespoons (3/4 stick) unsalted butter, softened
1 cup granulated sugar
2 large eggs
2 teaspoons pure vanilla extract
2/3 cup buttermilk (alternatively, you could also substitute it with 4-5 tablespoons milk and top up with homemade yoghurt to get 2/3 cup, as what Joyce had used)


Making the topping :
  1. Preheat the oven to 350F. Grease a 9-inch round non-stick pan.
  2. Heat the butter in a medium saucepan over a medium heat until foamy. Whisk in the brown sugar, turn the heat to low, and cook, whisking, for 2 minutes. Scrape the mixture into the prepared pan and smooth with a spatula. Arrange the banana slices in concentric circles on top of the sugar mixture. Set aside.

Making The Cake :
  1. Combine the flour, cocoa powder, baking soda, and salt in a medium mixing bowl.
  2. Combine the butter and granulated sugar in a large mixing bowl and cream with an electric mixer on medium-high speed until fluffy, about 3 minutes.
  3. With the mixer on low speed, add the eggs, one at a time, scraping down the sides after each. Turn the mixer to high speed and beat until the mixture is light and increased in volume, about 2 minutes. Stir in the vanilla.
  4. With the mixer on low, stir in 1/3 of the flour mixture. Stir in 1/2 of the buttermilk. Repeat with the remaining flour and milk, ending with the flour. Scrape down the sides of the bowl and beat the batter on high speed for 30 seconds.
  5. Pour the batter over the bananas, gently spreading it into an even layer.
  6. Bake until a toothpick inserted into the center comes out clean, 40 to 45 minutes. Transfer the pan to a wire rack and let stand for 5 minutes. Holding the pan and a plate together with oven mitts, immediately invert the hot cake onto the plate. If necessary, replace any fruit stuck to the bottom of the pan. Let the cake cool for 20 minutes and serve warm, or serve at room temperature. Store uneaten cake in a cake keeper, or wrap in plastic and store at room temperature for up to 2 days.

Wednesday, September 11, 2013

Orange Swiss Roll


I was sitting on the couch last night, all alone enjoying my dinner while watching my favourite channel, Asian Food Channel.  Immediately after that, I decided to have a piece of the cake I baked the day before for dessert.  Yes, pretty obvious it was a swiss roll.  The moment I opened the container, the sugary and citrusy scent of the orange flavour almost instantly wafted into the air making me all perked up.  I took a small bite and....'hey, it is not that bad after all!'

In fact, I was very disappointed with the outcome.  The bake did not turn out to be what I had expected.  Everything just seemed not right!  That night, I was doing some office work and at the same time I was baking.  Yes, very clever of me trying to kill two birds with one stone.  At the end of baking, I opened my oven door and was rather shocked to see my cake rose unusually high.  Panicked, I just increased the baking time to another 10 minutes.  Please do not ask me why I did so.  As soon as the cake was taken out, it just collapsed, so as my heart!  So, as expected, the cake was dry and flat.  Then, towards the end of the assembling process, the cream filling suddenly melted and was runny.  I thought of dumping the whole thing into the bin.  Finally, I chucked it into the refrigerator, angry and disappointed. 

The following morning, I was caught by surprise to see the cake, standing proudly and smiling at me and said 'Hi, I'm Miss Swiss, so how do I look like?'  It was rather magical to see her tranformation overnight.  It was as though Miss Swiss knew that I was pissed off with her, so she seek help from Mr. Refrigerator and the latter eventually helped her with the makeover. Ha ha, so dramatic!

Anyway, nonsense aside, I would say the taste of the roll is fairly good.  Not too sweet.  The orange flavour is apparent.  Indeed, orange always goes perfectly well with cream.  In a nutshell, as far as the taste is concerned, everything just blends well.  Though the cake is visibly on the dry side (because I have overbaked it), thank God the cream filling  (I used 100% whipping cream) sort of saves the day in that it moistens the whole thing.  So, it is acceptably delightful once it is in the mouth.  Texture wise, it is rather soft and smooth, just that it is not fluffy.

So, here you go, the recipe.......

The Ingredient:
(I adapted from Hippomama's Kitchen)

A) The Cake 
     4  egg yolks
     70g  orange juice
     1 tbsp orange rind
     40g  vegetable oil
     70g  cake flour, sifted

     4  egg whites
     60g castor sugar

B) Cream Filling
     200g  whipping cream
     1 tbsp superfine sugar

Method:
1.  Preheat oven 180c.  Line the cake tray with parchment paper.
2.  In a bowl, whisk in egg yolk, orange juice, orange rind and vegetable oil
     till well combine.  Add in flour, mix well.
3.  In another bowl, beat egg whites till foamy, add sugar in 3 additions.
     Beat till stiff. 
4.  Fold in 1/3 of the meringue into egg yolk mixture, then pour this mixture into
     the balance of the egg white and fold till well incorporated.
5.  Pour  the mixture into the cake tray and spread evenly.  Knock a few times
     on the tabletop to get rid of big bubbles in the batter.
6.  Bake in preheated  oven for 12-15mins or till golden.
7.  Remove the cake from the oven and let it rest to cool.
8.  Remove the cake from the tray and invert it.  Tear out the baking paper.
9.  Spread the top of the cake evenly with cream filling.
10.Gently roll the cake and refrigerate it for at least 1 hour before serving.


 Bon Appetite!

Saturday, August 24, 2013

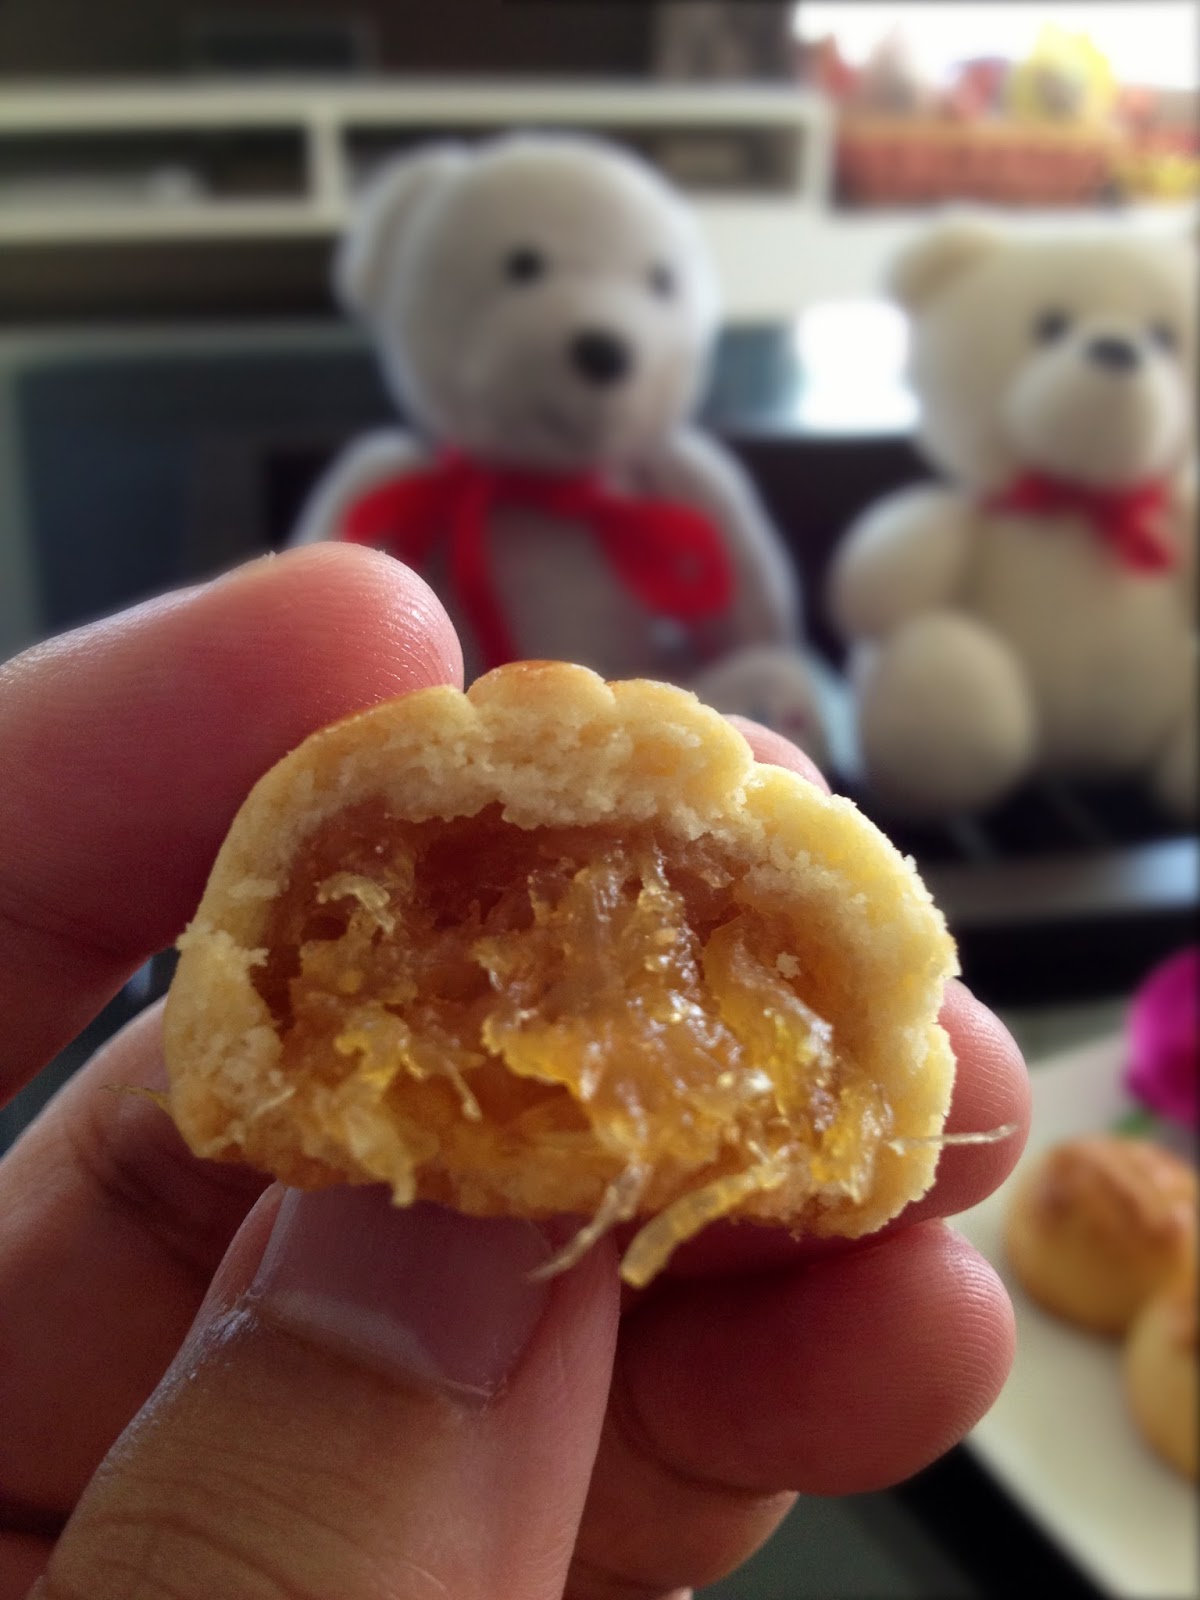
Melt-in-the-mouth Pineapple Tarts - Enclosed Version


Barely two months after I last blog about pineapple tarts, here I come again, with another version of this glorious sweetie!  This time round, it is the enclosed type.

Having grown  up eating loads and loads of homemade traditional Nyonya pineapple tarts which characteristically has its filling exposed, this bull-headed soul was just too dogged to recognize any other variations of the tart.  He was just too arrogant to even try them and to him, as though the open type was the ONLY one existed in this whole wide world. 

Thus, it comes to no surprise if I say this is my first time eating this version of pineapple tarts, apart from the Taiwanese Pineapple Cake which coincidentally also has its filling enclosed.

Taiwan Pineapple Cake
Malaysia Pineapple Balls
Thanks to Sonia of Nasi Lemak Lover, whose excellent and insightful posting on the enclosed version of the tart finally tamed down my arrogance and brought me a step closer into the realm of pineapple world.

What drew me into reading her posting and experimenting the tarts myself were basically because of these two factors:

  a) it is super-duper straightforward which only calls for four ingredients, yes ONLY 4, and they 
      are bu---, con----, f----- and e---.

  b) it is the best melt-in-the-mouth pineapple tart version though you may have your melt-in-
      the-mouth recipe

Huh?? Sure or not, Sonia??  Well, after taking my first bite, I would have to take my hat off.  You are absolutely correct!  The tarts are freaking melty!  Unquestionably, it is by far the best that I have ever tasted, too!


So, here it is, the secret reveals.....

Ingredients:

350g butter
100g condensed milk or sweetened creamer
510 plain flour
2 egg yolks

700g pineapple filling (homemade or store-bought).
You may find the recipe in my previous post here if you intend to make your own.

1 egg yolk + 1 tsp milk, for egg wash

Method:
1. Cream butter and condensed milk till light.
2. Add in egg yolk one at a time, and beat until combine.
3. Mix in flour to make a dough. Make sure it's not sticky.
4. Refrigerate for about 30 minutes.
5. Meanwhile, roll pineapple filling into balls
6. Flatten a piece of dough and place a ball of the rolled pineapple 
    filling in the middle.  Bring the edges of the dough together and 
    press lightly to seal.  Gently roll the ball on the surface of your
    table top so that the surface of the ball is smooth and neat.
7. Glaze the rolled balls with egg wash.
8. Bake in the preheated oven at 165C (fan forced) for about
    20 mins or till golden brown.
9. Cool completely before storing.


Happy baking!

Saturday, July 13, 2013

Nyonya Pineapple Tarts, The Crispy Type

 
I started making pineapple tarts about 2 years ago.  Seriously, pineapple tart making is utterly labour-intensive and time-consuming.  Nevertheless, it is indeed a labour of love.  For those who have attempted making this Nyonya staple, you should know what I mean!

The work includes cutting the pineapples, removing all the eyes (gosh, I hate this the most), grating the fruits, slow-cooking it under low heat until it turns jammy (well, this itself takes about 1-2 hours), preparing the dough, assembling everything and finally baking the tarts.  I usually spend about 3-4 hours just on the assembling part and just to make a batch consisting of a mere 50 bite-sized pieces.

Well, I have to say that the whole family: my wife, my kids, including my in-laws really have a weakness for pineapple tarts.  However, as a matter of fact, not only that the price of a box (of tarts) sold outside is escalating like nobody's business but getting one that is nice and authentic is indeed hard to come by nowadays.  Hence, I feel it is high time that I get my hands dirty and learn to make my own.  Well, before getting down to business, I did my homework ie doing lots of reading from the net including seeking advice from my septuagenarian aunt (I affectionately call her Tuah Ee) whom we, among the relatives recognize her as the sifu of pineapple tart.  So, this could be the reason why when I made my very first batch of tarts, I did not encounter much hiccups and the outcome was fairly good and far from being disastrous.  I have made pineapple tarts for umpteen times and am now still fine-tuning it.

Basically, there are two types of pineapple tarts ie the hard crispy type and the soft melt-in-the mouth type, the latter being more preferable.  Actually, it all boils down to the pastry.  Personally, I prefer the hard crispy pastry.  I do not like it too hard though but most importantly, the pastry must be crissppy.  When you make a cross section to the tart, you can see layers forming the pastry.  This is what I mean......


Well, it all depends on the butter and the duration of baking.  To get this result, you must use the rub-in method.  While rubbing the butter with flour, it is important that you do not allow chance for the butter to melt.  That is the reason you need to work using your finger tips (as this is the coolest part of the hand) and everything needs to be done fast.  Secondly, you must never knead the dough.  Next, to make the pastry crispier, you just need to bake the pastry a little longer (about 5-10 minutes longer).

If you like the crispy type, nah....here you go :

Recipe
(this yields about 50 pcs depending on how thick is your pastry and the size of your pastry cutter)

A) For the pineapple jam:
        - 500g grated or chopped pineapple flesh (I always chopped)
        - 125g caster sugar
        - 125g rock sugar
        - 5 cloves
        - 2 cinnamon sticks

        Method
        1. In a heavy based saucepan, place the grated pineapple and spices and stir
            to dry the pineapple before adding the sugar.
        2. Once the sugar is added, reduce heat to low and stir regularly for about
            1 hour or until pineapple jam is relative dry. (remember that when you
            bake the tarts, the jam will further dry out)
        3. Make sure you stir it frequently as the bottom will burn easily.  Once it's
            thick and jammy, take it off the heat, remove the spices and allow to cool
            completely.
        4. Refrigerate for at least 1 hour or overnight.  This makes it easier for us to
            shape it into balls later.


B) For the pastry:
     - 500g plain flour
     - 300g unsalted butter (slightly softened)
     - 2 eggs
     - 1 tsp salt
     - 2 tbsp icing sugar
     - 1 egg yolk (for brushing over pastry to create golden hue)

      Method
      1. With your fingertips, rub together the flour and butter until it resembles
          bread crumbs.
      2. Add the egg and gently coax all the crumb until it binds together.
      3. Bring it together and shape it into a disc (remember, DO NOT knead)
      4. Wrap it in cling wrap and refrigerate for at least half an hour. 

C) The Assembling Process:
        1. Pre-roll the pineapple jam into small balls.
        2. Roll out the pastry dough to desired thickness.  Cut out dough using cutter.
            Arrange neatly onto the baking tray.
        3. Once you have arranged the tart shells on your tray, pop them into the
            pre-heated oven.  Bake at 175 degree Celsius for aboiut 10 minutes or until
            the shells are about to turn brown.  Note that at this point, the tart shells will
            expand.
        4. Take out from the oven and glaze the rims with egg wash.
        5. Place the pre-rolled pineapple jam balls onto the centre of each tart shell.
        6. Make a criss-cross pattern on the jam.  Then, glaze the patterns.
        7. Pop into the oven for the 2nd time.  Bake for another 10 minutes or until
            the tarts turn golden brown.


HAPPY TRYING!!