Showing posts with label Dessert. Show all posts

Monday, June 27, 2016

Lime Cupcake

 
This cake is so good that it drew me to make the second batch the next few days.  I personally love the cake a lot due to the tinge of lime in it.  Needless to say, the cake is soft, moist and fluffy.  Most importantly, the lime frosting just blends so well with the cake in that it never fails to perk up the palate and puts a smile on your face.

I got the recipe from Ann Low of Anncoo Journal when she posted it on Facebook.  The caption and photos were good enough to capture my eyes and before I knew it, I was already at the market talking to the vendor asking him to explain the different types of limes he sold.  Whipping up the cake was not at all difficult nor complicated.  So, if you are a newbie at baking or want to whip up a quick simple dessert for a potluck party, please seriously consider this recipe! 


While I was writing this blog (in McDonalds', my usual hangout spot after breakfast), suddenly I got interrupted by an old aunty whom I had recently made friend with.  Apparently, I had given her a piece of the cupcake before I settled myself down at my table.  She walked up to my table and this is what she uttered:

"Tan, I'm already 74 years old and this is my first time eating a cake made by a man.  See, I finished the cake.  Thank you, thank you sooo much!  God bless you!" 

When she walked away, I was still sitting at my table grinning like a Cheshire cat.  All I know, it is indeed a GOOD MORNING today!


The Recipe:
yields about 8-9 pcs

The Cake
  • 2 large eggs
  • 150g butter, softened
  • 100g caster sugar
  • 75g yoghurt
  • 115g self-raising flour
  • zest of 2 limes
  • ½ tbsp lime juice
 The Lime Frosting
  • 100g icing sugar, sifted (too sweet for my taste bud, I recommend reducing to 80g)
  • 70g butter, room temperature
  • 1 tbsp lime juice
  • zest of 1 lime
Instructions
  1. Preheat the oven to 160 deg C. Line muffin pan with 9 cupcake papers.
  2. Lightly beat eggs, add butter and sugar, then mix until light and fluffy.
  3. Add yoghurt and flour, stir to combine with a hand whisk. Add lime zest and lime juice, mix well again.
  4. Divide the mixture evenly into the cake cases. Bake for 25-35 minutes until risen and golden brown. Allow to cool before icing.
  5. Topping ~ Meanwhile, combine the topping ingredients, mix with a rubber spatula or wooden spoon, and spread onto cakes. Top with lime candy or decorate as desired.


Thursday, October 1, 2015

No-baked Mango Yogurt Cheesecake

 
For those who love mangoes, then this cake can be a winner and is certainly worth trying!  To me, mango blends just well with cream cheese.  The aromatic smell of mangoes just lingers around giving a nice fruity smell to your kitchen.  

Well, this cake is not at all difficult to prepare.  Nothing complicated.  Pretty straight forward.  All that is needed is just measure, mix and pour.  So, it is suitable for any newbies who want to impress your guests or to prove to someone that you can actually bake.  Trust me, this cake will sure to blow them away.


Make sure you take it when it's chilled.  Believe me, the moment the cake sets in your mouth, the feeling is just heavenly so much so that your taste buds can't thank you enough!  Everything seems fall into place and your palate is suddenly perked up with all kinds of tastes and senses - sweet, salty, sourish, creamy, chilly, fruity and the list goes on!


This recipe is definitely a keeper.  I stumbled upon the recipe on Facebook, from Anncoo Journal.  My ravenous eyes were captivated by her photos which to me were just picture perfect.  The cake was standing gorgeous and irresistibly appetizing!  I strongly recommend that you take a look and visit her blog, here!

Ingredients:
   
  Cake base
     100g digestive biscuits
     80g melted butter
  • Grease the sides of a 8 inch removable cake pan and line the bottom. Blend biscuits coarsely and mix well with melted butter (add little more butter if you find the crumbly biscuits are too dry). Pressing the biscuit crumbs with your hand at the bottom of the lined cake pan. Put the tin in the fridge for later use.
      Cheese filling:
      250g cream cheese, room temperature
      3 tbsp fresh milk
      3 tbsp icing sugar or to taste
      280g mango yogurt (about 2 small tubs)
      1/2 tbsp lemon juice
      150g fresh topping cream/non-dairy whipping cream
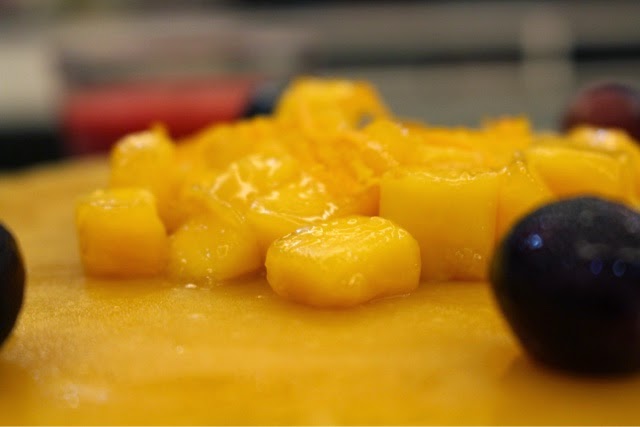
      1 fresh mango, cut into cubes
      1.5 tbsp gelatin + 2 tbsp water

      Mango Topping
      2 fresh mangoes, chopped , about 320g
      1 tbsp sugar or to taste
      1/2 tbsp lemon juice
      1 tbsp gelatin + 1 tbsp water


Method:
      Cheese filling: 
  • Put gelatin and water in a bowl and soak for a while. Then place it in a double boiler until gelatin dissolved. Keep warm.
  • Beat cream cheese and icing sugar at medium speed with 3 tablespoon of fresh milk until smooth. Pour in gelatin and mix well. Add mango yogurt and lemon juice into cheese mixture, continue beating until combined.
  • Whisk fresh topping cream until soft peak and pour into the cheese mixture, fold well.
  • Pour half of the cheese mixture into the prepared cake pan; add in mango cubes, followed by the remaining cheese mixture.  Set aside in the refrigerator.
      
       Mango topping
  • Put gelatin and water in a bowl and soak for awhile. Then place it in a double boiler until gelatin dissolved. Keep warm.


Thursday, August 21, 2014

Fluffy Pancake


If you are looking for a light, soft and fluffy pancake, then this recipe will win you over.  Though I am not a fan of pancakes, I do crave for it once in a blue moon.   I have tried making it once but wasn't really satisfied with the outcome.  They turned out a little rubbery and compact.  But this recipe gives you a really soft and light texture that it easily absorbs anything that is spread and drizzled on be it butter, honey or syrup.

One thing that I like about this recipe is that it uses the egg separation method.  Egg whites and egg yolks are beaten separately and this eventually makes the pancake light and fluffy.  A drizzle of any kind of syrup (for me I like maple syrup best) or even honey is just what you need to complete everything and to brighten your day.      


Well, just a little bit of sharing....I have learnt the following tips in order to make a good pancake : 

  1. Never over-flip your pancake so that you can get a fluffy pancake.  Over-flipping will just deflate the pancake.
  2. To know when exactly you need to flip the pancake is to wait for the bubbles to form in the centre and then burst.
  3. Always apply oil to the pan with wadded paper towels.  This is necessary to avoid  uneven cooking.  If you pour oil directly into the pan, in may pool in some areas while leaving other parts of the pan dry.  The uneven cooking will cause the flapjacks to burn in some areas and undercook in others.  
  4. Once the pancake is cooking on the pan, give it some space. Do your best not to shake the pan or move the batter -- this will hinder the pancake from rising properly.

If you wanna try making your own pancakes, here's the recipe, adapted from Edith of Rumbling Tummy.  Till then, have a great day ahead!

Ingredients:

280g plain flour
8g baking powder
78g castor sugar
½ tsp salt
3 egg, separated
1.5 cup milk
85g melted unsalted butter
1 tsp vanilla


Method:
  1. Sift flour and baking powder. Add sugar and salt together into a large bowl.
  2. Whisk yolks, milk, melted butter and vanilla together.
  3. Whisk wet mixture into the dry mixture. Should be slightly lumpy.
  4. Whip the egg white until medium peak. Not stiff. Do not over whip the egg whites.
  5. Gently fold in half of the egg white into the egg batter with a large spatula. Then gently fold in the remaining egg white.
  6. The batter should be slightly lumpy and have large parts of the egg whites not fully incorporated.
  7. Heat pan and add 1 tsp butter. With a fat ladle, scoop the batter and pour into the hot pan.
  8. Flip over once brown to cook the other side.
Serve warm.

Happy trying!


Friday, July 4, 2014

Chocolate Molten Lava Cake

Frankly, I have never eaten this cake before let alone baking one myself.  Of course, people around me have been lamenting how much they adore this cake and some even got hysterical and rhapsodic by just hearing its name, especially the words MOLTEN...LAVA!!

Certainly, I do concur that the name itself is already enticing enough to itch your taste buds and eventually making your mouth salivate and your heart yearn to try one.  That's what exactly happened to me.  I have been longing to try eating and baking one myself.

So, last weekend, I managed to squeeze some time out to do some readings trying to look out for a decent recipe.  Hey! The recipe is somehow pretty straightforward and not at all complicated.  The ingredients used are very basic and easily available.  The procedure is just a child's play as claimed by others.  Another shocking fact I found out from some of those who have made one - the bake was.........SHOCKINGLY EASY!!!  Any Tom Dick and Harry can whip one!

As easy as it has been said, this dunghead somehow failed on his first attempt.   Only on his second attempt then he realized that he was not cut out for this cake.  His third try was just as disastrous as the other two.  However, persistency wins at last.  Exactly, I finally succeeded on my fourth try!  The first three came out cakey and hard in that there was NO molten lava whatsoever sloshing out upon cutting.  Reason?  Easy,......I have overbaked it.  Even extra one minute counts and matters.  So, my advice for those of you who intend to bake one yourself, please make one piece first and see the outcome, only then you bake the remaining pieces.


So, what's my final verdict on the successful piece?  Frankly, I enjoyed better eating the failed cake which is hard and cakey.  So as my son, he loved the first three batches much more than the last successful one.  Though no lava, the cake just goes perfectly well with a dollop of vanilla ice-cream.  I somehow feel a tinge of guilt and uneasiness eating the seemingly 'uncooked' chocolate liquid that oozes out.  Anyway, that is just my personal intuition.  You may not agree with me.  I may be the odd ones! He he...

So, for those of you who want to try making one yourself, here you go babe, the recipe adapted from Foodie By Nature.


INGREDIENTS
(yields about 5-6 pcs)
  • 4.5 ounces of dark chocolate, finely chopped
  • 110 grams of butter
  • 3 large eggs
  • 3/4 cup castor sugar-approximate 150 gms (I reduced to 100g)
  • 1/4 cup all purpose flour(35 grams)
  • Vanilla extract 1 teaspoon
  • 5-6 moulds or ramekins depending on size
  • Chocolate powder

METHOD


  1. Preheat oven at 200 degrees C for half an hour
  2. Butter moulds and dust with chocolate powder so it sticks to the butter..tap away excess
  3. Put chocolate and butter in a double boiler whisking every now and then until melted. Add vanilla extract
  4. In a bowl whisk together eggs,sugar and gradually flour until well blended. Slowly add melted and cooled chocolate-butter mixture
  5. Pour mixture into moulds / ramekins and put in oven ( up and down grill on)
  6. Place in center of oven and bake for approximate 12 mins or until sides leave moulds and top is cracked but wobbly.  The time will vary from oven to oven..start checking after 10 mins (Mine baked at 9 mins)
  7. Remove and serve at once.have straight from the mould until u try it a couple of times..then you can start turning it upside down once you are more confident. Serve with vanilla ice- cream..

Monday, April 21, 2014

Ondeh-ondeh

 This is another classic dessert in Malaysia and Indonesia and very popular among the Malays and Peranakans.  It is called ondeh-ondeh in Malaysia but klepon in Indonesia.  It is basically a boiled rice cake, shaped into balls, stuffed with gula melaka (palm sugar) and rolled in fresh grated coconut.  Eaten as morning or afternoon snacks, this traditional dessert is very much liked by many, both locals and tourists.

Eating a ball of ondeh-ondeh can be quite suspenseful but delightfully satisfying.  When the ball is stuffed into the mouth, one is already anticipating that it is going to literally burst in any seconds.  Upon bursting, the palm sugar liquid is explosively oozed out from the ball sending a pleasing sweet sensation to the whole palate. 

I made this at home a couple of weeks back, after my successful attempt getting my daycare students to make ondeh-ondeh during the school holiday.  Though it was our first trial making this dessert, the outcome turned out to be surprisingly good receiving lots of thumbs up from the students and teachers alike.  I got the recipe from Mrs Tan, the cook for my daycare centre who is married to a Baba and loves exploring Nyonya cuisine.  A big THANK YOU to you, Mrs Tan!

One thing I like about this simple recipe which made my students ooh and aah that day is it calls for sweet potato, the secret ingredients that made the balls so wonderfully soft and smooth.  So, if you want to give this classic indulgence a try, here you go.......scroll down!


The Recipe:
(yields about 40 to 50 pcs)

350g glutinous rice flour
250g sweet potatoes
3 tbsp pandan juice (screwpine leaf juice)
1/2 tsp salt
3/4 cup plain water

200g gula Melaka (palm sugar), finely chopped
1 fresh grated coconut


Method:


1.  In a heavey saucepan, boil the sweet potato until soft and tender. Then, mashed and set aside.

2.  In a large bowl, combine the glutinous rice flour with Pandan juice and water.
     Then, knead lightly.

3.  Combine the dough with the mashed sweet potato and knead.

4.  Bring a pot of water to boil. Pinch a small piece of dough (about 15 g each) and flatten lightly.
     Fill the center of the dough with palm sugar.

5.  Roll them in your palm to form a smooth ball and cook the glutinous rice balls in the
     boiling water. When the rice balls float to the surface, remove them with a slotted spoon
     and shake off the excess water.

6.  Mix the grated coconut with a pinch of salt and steam for about 2 – 3 minutes and let it
     cool completely.

7.  Coat the rice balls with grated coconut and serve immediately.


HAPPY TRYING!

Thursday, April 17, 2014

Apom Bokwa With Banana Gravy

This is indeed a typical Baba-Nyonya (Straits-born Chinese a.k.a the Peranakans) dessert that is stepping into 'extinction'.  I only got to eat this whenever my septuagenarian aunt (tua ee) makes it.  I reckon that to many, especially those born in the 80s and below, this dessert is a childhood food that is bound to take you stroll down memory lane.

As a matter of fact, not many nyonyas now know how to make this classic cake (and pardon me, I am referring to today's young modern nyonyas, k!).  So, this accounts for the fact that this traditional kueh (cake) is so hard to come by nowadays.  As a Baba who currently lives in Malacca and loves cooking, I feel called to revive this dying classic.

Well, it all started when I was browsing through my Facebook News Feed a couple of days ago and suddenly someone posted a photo of this dessert.  It caught my eyes almost instantly.  Scrolling down on the comments made me realize that there were so many, both Malaysians and Singaporeans still craving for this dessert.  At the drop of a hat, I googled for the recipe.  Surprisingly, not many I could find except for Amy Beh's, an iconic figure where nyonya food is concerned.

I could have asked my tua ee or even my mummy for the recipe but I doubted they have it written down.  One thing for sure, they will confuse me with their 'agak-agak' (roughly) statement.  Whatever it is, come to think of it, my hats off to these elder nyonyas, anyway.  They just have all their recipes stored in their head without having to refer to any cook books. Just imagine how many of them and if you are a Straits-born, you will agree with me that Peranakan dishes are relatively complicated to prepare incorporating varieties of ingredients and spices.  Even their methods are not that straightforward.  And yet, all these are cleverly stored in their grey matter. RESPECT! RESPECT!

So, how's the verdict of Auntie Beh's recipe and my labour of love?  Generally, I'm very satisfied with what came out.  Though a little complicated with lots of steps to follow, I am indeed pleased with the outcome.  What I heard and gathered from my aunt and a few other elders was that to know as to whether you have succeeded in making the apom (pancake) or not was to look at the the tiny punctures on the surface of the apom.  The more the holes, the better the pancake.

And taste wise? Well, it was surprisingly close, though not exactly the same to that of my auntie's apom.  There is a slight tinge of sourish in the apom.  It could be from the yeast (I guess so, maybe someone can shed some light here!).  From my observation, the longer the rice batter is fermented, the sourer the pancake turns out to be, and the more the holes will form!  Anyway, not to worry, when the apom is dipped and blended together with the sweet banana gravy, it neutralizes everything and the result............HEAVENLY!


So, here I come, bringing you Amy Beh in the house, virtually......
 
Ingredients
By Amy Beh

I) The Cake/Apom
    (A)  Mix these ingredients together and leave aside to soak for 10 minutes:
            - 500g rice flour (I reduced it to 300g.  500g is just too much making it impossible to soak)
            - 25g glutinous rice flour
This is EBU
            - 300ml coconut water

     (B) Mix these ingredients, leave aside for 15 minutes.  Cook over 
           low flame until it turns gluey to make "Ebu":
           - 50g rice flour
           - 150ml water

     (C) Mix these ingredients and leave aside to froth:
            - 1/4 cup lukewarm water
            - 1/4 tsp sugar
            - 1 tbsp instant yeast
    
      (D) - 160ml pati santan (thick coconut milk)

II) The Sauce: 
      (A) Prepare the syrup
             - 75g brown sugar
             - 50g gula melaka
             - 175ml water
             - 3 pandan (screwpine) leaves 
       (B) Mix these ingredients together and allow the rice to expand:
             - 2 tbsp glutinous rice flour
             - 25ml water

       (C) - 50ml pati santan
             - 1/4 tsp salt
         
       (D) - 3 rippen bananas
     
  Method:

    Blend ingredients (a) and (b) together. Mixin 1/2 tsp salt and stir well with a hand whisk. Add in (c) and set aside for 30 minutes. Cover with a damp cloth for it to rise to double its size. 
    Blend in (d) and proof for another 50 minutes. Heat a brass apom mould and grease lightly with corn oil.
     
    Pour in enough batter to fill the mould three-quarters full and cook over medium heat. Cook till bubbles appear. Cover mould with a lid till the top part of the apom is cooked. Touch centre of apom with finger - if it is firm and not sticky, the apom is ready.
     
    To make sauce: Bring (a) to a boil, strain the hot syrup into (b). Stir well and transfer to a saucepan and cook over medium low flame. Add in (c) and (d) and stir well till sauce thickens. Pour sauce into a small bowl and serve with apom bokwa.
HAPPY TRYING!

Sunday, November 10, 2013

Crusty Apple Pie


I was looking for a pie recipe when I stumbled upon this lovely blog over here by Alice of I Love. I Cook. I Bake.  Her photos and write up, though short and simple were just sufficient to capture my attention, kept me drooling and eventually set my heart on trying this simple yet tantalizing classic dessert.

What exactly caught my eye on this recipe was the fact that it called for cream cheese for the crust.  As far as I am concerned, people normally use either vegetable shortening or butter.  But cream cheese? This is surprisingly interesting, something new and rare to me.  Apparently, it was said that the cream cheese was the main thing that made the pie so very crispy and crusty.  And for this particular reason, I was dying to give this dessert a shot.

All in all, it was a pretty easy bake.  Straightforward.  Nothing complicated.   As both me and my wife are never an apple pie fan and knowingly that none of my kids has actually tried this dessert, I dared not take the risk and wisely halved all the ingredients, otherwise (if the bake didn't turn out right), I would have my three meals stuffed with only apple pies.  As such, I made a cutie 6-inch pie.  No pie pan used, just laid it on the baking tray.

Well, I was somehow lucky that I made the correct decision - making a mini version. Reason?  The pie did not turn out to be what I had expected.  I did not seal the crust well.  The juice from the apples leaked while baking and as a result the pie was a little on the dry side.  I had expected the filling to be a little slushy.  How I wished that when I slit cut the pie, the apple sauce just immediately sloshed out.  Don't you think that's heavenly?  Well, other than these minor hiccups, the rest was just perfect.  The apple slices were baked to perfection, they are soft tender. The crust was creamy and flavourful.  Since the pie was a little dry, I complemented it with a dollop of vanilla ice-cream.  Aaah.......sinfully blissful!

Wanna try?  Here's the secret........  

The Recipe: 
(Yield: one 12" pie) 

The Crust

  • 2 cups all-purpose flour
  • 3/4 teaspoon salt
  • 2 tablespoons buttermilk powder, optional*(I omitted this)
  • 1/2 cup cream cheese
  • 10 tablespoons cold butter
  • 3 to 4 tablespoons ice water

 The Filling

  • 1/2 cup Baker's Cinnamon Filling mixed with 2 tablespoons water*
  • 3 medium-to-large fresh apples, peeled, cored, and thinly sliced
  • dash of salt
  • 2 teaspoons lemon juice
  • 2 tablespoons butter, cut in small cubes
  • *Substitute 1/2 cup granulated sugar and 2 teaspoons ground cinnamon for the Baker's Cinnamon Filling and water, if desired. If you use sugar and cinnamon, DO NOT ADD THE WATER.

The Topping

  • 2 tablespoons coarse sparkling white sugar

 Direction

  1. To make the crust: Put the flour in a bowl, or in the work bowl of a food processor. Add the cream cheese, salt, and buttermilk powder. Mix together until everything is evenly crumbly. If you're using a food processor, just a few quick pulses are all you'll need.
  2. Cut the cold butter into pieces and work it into the flour, leaving some visible pieces.
  3. Sprinkle the dough with the cold water and toss. Squeeze the dough to determine if it holds together. If it's too dry, add water 1 tablespoon at a time, using just enough so the dough will hold together.
  4. Divide the dough in two pieces, one slightly larger than the other. if you have a scale, one piece should be about 9 ounces; the other about 10 ounces. Flatten each piece of dough into a disk, wrap well, and refrigerate for 30 minutes or longer.
  5. Remove the larger piece of dough from the refrigerator, and roll it into a 13" circle. Place it in a 12" shallow pizza pan, or onto a parchment-lined baking sheet. The parchment is there to catch any spills and simplify cleanup; if you don't have it, there's no need to grease your pan.
  6. Spread the Baker's Cinnamon Filling mixture atop the crust. If you're using sugar and cinnamon, simply sprinkle it evenly atop the crust.
  7. Arrange the apples in concentric rings atop the filling. Or, if you don't feel like being that fussy, simply spread the apples over the crust.
  8. Sprinkle the apples with a dash of salt, and drizzle with the lemon juice. Scatter the bits of butter over all.
  9. Remove the other piece of dough from the refrigerator, and roll it into a 12" circle. Place it atop the apples. Bring the edge of the bottom crust up over the top, pressing to seal.
  10. Brush the crust with milk, and sprinkle with coarse white sparkling sugar, if desired. Cut a dime-sized hole in the middle; or cut several 1" slits across the top, for steam to escape.
  11. Bake the pie in the preheated 425°F oven for 15 minutes. Reduce the heat to 375°F, and continue to bake for an additional 25 to 35 minutes, or until the crust is golden brown and you can see some filling bubbling through the slits in the top.
  12. Remove the pie from the oven, and wait about an hour before cutting into wedges and serving.

Thursday, September 19, 2013

Mille Crepe Cake


I have to say Mille Crepe Cake is my kids' top favourite cake.  I can't exactly remember when I started making this desert but it was somewhere in 2009 after I purchased my first ever Flavours Magazine where the recipe was hidden inside.  I have totally lost count as to how many times I have made this cake, but all I can remember is whenever I announce that I am going to make one, my son will be prancing and jumping around in glee.  

Well, Mille Crepe Cake is made famous in Malacca by Nadeje Cake House  which specializes in (of course) crepe cakes.  Established in 2006, this cake house has been flourishing steadily and has indeed been an iconic desert house in Malacca, so much so crepe cake is already synonymous to the name of its restaurant.  Local tourists when visit Malacca will very likely put Nadeje and Crepe Cake  as their must-visit place and must-eat food on their itinerary.  Some even go on to say that no trip to Malacca will be complete if one does not visit Nadeje or eat crepe cake, just as no trip to Malacca is complete if one does not visit the Stadhuys or eat the Melaka Satay Celup or the Chicken Rice Ball.  So, there it is, the influence of crepe cake in Malacca.

By the way, I made this cake last Sunday when my mother-in-law and two sisters-in-law together with their children gathered at my house to celebrate Mid Autumn Festival or some called it Mooncake Festival.  Ironically, there was no mooncake served but crepe cake.  I know that the children love eating crepe cake, so I thought it would be a good idea to pamper them with this indulgence while they fiddle with their paper lanterns.  Anyway, everyone was engrossed enjoying the cake that none of them including the adults noticed the absence of the mooncake.  So, this proves to say that my crepe cake ruled the night! Ha ha!


Well, joke aside, making crepe cake is another laborious work.  For the first timers, the task can be really time-consuming and daunting although there's no baking involved.  It can easily eat half of your day away.  The steps include:

1. Making the crepe batter
2. Making the pastry cream
3. Making the crepe sheets.  This is really tough.  It usually takes me 1 1/4 hours to make 20pcs
4. Assembling all the above

Generally, I am acceptably happy with the taste of the cake.  It's rich in flavour.  To some who don't take milk, the taste of milk can be a little overpowering.  The cake also gives out a very nice pleasing milky scent.  But two things that I am still struggling to achieve are:

1. The thickness of crepe sheets.  All I want is the paper-thin type, just like what Nadeje produces.
2. The pastry cream.  Mine does not look sturdy in that it does not hold and support the crepe sheets
    well.  It will just melt, collapse and become runny.  I hope somebody can shed some light here!
    Is there anything that I should add or any other cream I should substitute it with? 

So, here's the recipe I have been using:

The Recipe:
(I adapted it from Cream Puffs In Venice)

A) The Crepe Batter (makes 20 pcs of crepes)
6 tablespoons butter
3 cups milk
6 eggs
1 1/2 cups all-purpose flour
7 tbsp. sugar
Pinch salt
vegetable oil

Method:
The day before serving the cake, make the crepe batter and the pastry cream. For the batter, cook the butter in a small pan until brown like hazelnuts. Set aside. In another small pan, heat the milk until steaming; allow to cool for 10 minutes. In a mixer on medium-low speed, beat together the eggs, flour, sugar and salt. Slowly add the hot milk and browned butter. Pour into a container with a spout, cover and refrigerate overnight.

To make the crepes, bring the batter to room temperature. Place a nonstick or seasoned 9-inch crepe pan over medium heat. Swab the surface with the oil, then add about 3 tablespoons batter and swirl to cover the surface. Cook until the bottom just begins to brown, about 1 minute, then carefully lift an edge and flip the crepe with your fingers. Cook on the other side for no longer than 5 seconds. Flip the crepe onto a baking sheet lined with parchment. Repeat until you have 20 perfect crepes.

 
B)The Vanilla Cream Pastry:
2 cups milk
1 tbsp. vanilla extract
6 egg yolks
1/2 cup sugar
1/3 cup cornstarch, sifted
3 1/2 tbsp. butter

Bring the milk to a boil. Turn off the heat and stir in the vanilla extract then set aside for 10 minutes. Fill a large bowl with ice and set aside a small bowl that can hold the finished pastry cream and be placed in this ice bath.

In a medium heavy-bottomed pan, whisk together the egg yolks, sugar and cornstarch. Gradually whisk in the hot milk, then place pan over high heat and bring to a boil, whisking vigorously for 1 to 2 minutes. Press the pastry cream through a fine-meshed sieve into the small bowl. Set the bowl in the ice bath and stir until the temperature reaches 140 degrees on an instant-read thermometer. Stir in the butter. When completely cool, cover and refrigerate.

C) To assemble:

2 cups heavy cream
1 tablespoon sugar
3 tablespoons Kirsch
icing sugar (optional)

Whip the heavy cream with the tablespoon sugar and the Kirsch. It won’t hold stiff peaks but that’s okay. Fold it into the pastry cream.

Lay 1 crepe on a cake plate. Using an icing spatula, completely cover with a thin layer of pastry cream (about 1/4 cup). Cover with a crepe and repeat to make a stack of 20, with the best-looking crepe on top. Chill for at least 2 hours. Set out for 30 minutes before serving. If you have a blowtorch for creme brulee, sprinkle the top crepe with 2 tablespoons sugar and caramelize with the torch; otherwise, dust with confectioners’ sugar. Slice like a cake.

Must try yah!


Wednesday, September 11, 2013

Orange Swiss Roll


I was sitting on the couch last night, all alone enjoying my dinner while watching my favourite channel, Asian Food Channel.  Immediately after that, I decided to have a piece of the cake I baked the day before for dessert.  Yes, pretty obvious it was a swiss roll.  The moment I opened the container, the sugary and citrusy scent of the orange flavour almost instantly wafted into the air making me all perked up.  I took a small bite and....'hey, it is not that bad after all!'

In fact, I was very disappointed with the outcome.  The bake did not turn out to be what I had expected.  Everything just seemed not right!  That night, I was doing some office work and at the same time I was baking.  Yes, very clever of me trying to kill two birds with one stone.  At the end of baking, I opened my oven door and was rather shocked to see my cake rose unusually high.  Panicked, I just increased the baking time to another 10 minutes.  Please do not ask me why I did so.  As soon as the cake was taken out, it just collapsed, so as my heart!  So, as expected, the cake was dry and flat.  Then, towards the end of the assembling process, the cream filling suddenly melted and was runny.  I thought of dumping the whole thing into the bin.  Finally, I chucked it into the refrigerator, angry and disappointed. 

The following morning, I was caught by surprise to see the cake, standing proudly and smiling at me and said 'Hi, I'm Miss Swiss, so how do I look like?'  It was rather magical to see her tranformation overnight.  It was as though Miss Swiss knew that I was pissed off with her, so she seek help from Mr. Refrigerator and the latter eventually helped her with the makeover. Ha ha, so dramatic!

Anyway, nonsense aside, I would say the taste of the roll is fairly good.  Not too sweet.  The orange flavour is apparent.  Indeed, orange always goes perfectly well with cream.  In a nutshell, as far as the taste is concerned, everything just blends well.  Though the cake is visibly on the dry side (because I have overbaked it), thank God the cream filling  (I used 100% whipping cream) sort of saves the day in that it moistens the whole thing.  So, it is acceptably delightful once it is in the mouth.  Texture wise, it is rather soft and smooth, just that it is not fluffy.

So, here you go, the recipe.......

The Ingredient:
(I adapted from Hippomama's Kitchen)

A) The Cake 
     4  egg yolks
     70g  orange juice
     1 tbsp orange rind
     40g  vegetable oil
     70g  cake flour, sifted

     4  egg whites
     60g castor sugar

B) Cream Filling
     200g  whipping cream
     1 tbsp superfine sugar

Method:
1.  Preheat oven 180c.  Line the cake tray with parchment paper.
2.  In a bowl, whisk in egg yolk, orange juice, orange rind and vegetable oil
     till well combine.  Add in flour, mix well.
3.  In another bowl, beat egg whites till foamy, add sugar in 3 additions.
     Beat till stiff. 
4.  Fold in 1/3 of the meringue into egg yolk mixture, then pour this mixture into
     the balance of the egg white and fold till well incorporated.
5.  Pour  the mixture into the cake tray and spread evenly.  Knock a few times
     on the tabletop to get rid of big bubbles in the batter.
6.  Bake in preheated  oven for 12-15mins or till golden.
7.  Remove the cake from the oven and let it rest to cool.
8.  Remove the cake from the tray and invert it.  Tear out the baking paper.
9.  Spread the top of the cake evenly with cream filling.
10.Gently roll the cake and refrigerate it for at least 1 hour before serving.


 Bon Appetite!