Showing posts with label Chocolate. Show all posts

Tuesday, April 21, 2015

Butter Chocolate Cheesecake


Personally, I love this cake a lot, from baking it, eating it or just by looking at it.  The texture, pattern and color combination are just too pleasing to the eyes and irresistibly indulging to the palate.  

I am never a fan of cheesecake as I find it too creamy and fattening and a lot of it is cloying but for this particular one, it just wins me over.  To me, chocolate and cheese is indeed a great combination, thus it never fails to make a great dessert.  The moment my eyes caught sight of the photo and recipe (by Ann Low of Anncoo Journal), I was all set and fired up to make my very own one.


Of course, it doesn't take too long to bake and the process itself is nothing complicated.  The ingredients used are pretty standard and predictable if you are used to making butter cake and cheesecake.  The only thing that caught me by surprise is the use of whipping cream instead of milk. I am not sure whether was it that the cream made the cake so soft and fluffy.  Whatever it is, this recipe is worth trying and definitely a keeper.  It certainly makes a great and presentable dessert for any potluck or home party.


Recipe:

Ingredients: 

(A)

250g Butter, softened

160g Caster sugar

4 large Eggs (about 70g each)

1tsp Vanilla extract

170g Self-raising flour plus 4tbsp cocoa powder, sift together into a bowl 

5tbsp Milk (I used whipping cream)


(B)

250g Cream cheese, room temperature

60g Caster sugar

3 tbsp Whipping cream (optional)

1 large Egg, about 70g

1tbsp Self-raising flour

      Method:

  • Grease and line a 8 inch square cake pan. Preheat oven to 160 deg C.
  • Beat ingredients (B) till fluffy and set aside.
  • From ingredients (A), beat butter and sugar till pale and fluffy, add in eggs one at a time and mix well, add in vanilla extract and whipping cream, mix well.
  • Fold in sifted flour and cocoa powder with a rubber spatula in 2 portions into butter mixture, mix well.
  • Spread half portion of batter into pan, then spoon in cheese mixture (B), cover cheese mixture with the remaining portion of cake batter (total of 3 layers). Then use a chopstick to swirl through the batter to create the marbling effect.
  • Bake for 60-70 minutes or skewer inserted in the cake comes out clean.

Saturday, December 27, 2014

Flourless Chocolate Cake


RICH! RICH! RICH! This is the only adjective that I can think of right now.  This is my first time baking and eating a flourless cake.  I baked this cake together with my cousin, Doreen when she came to visit me.  While she was whisking her soft fluffy orange cake, I was busy whipping this gorgeous little sweetie.  YES, we baked two cakes that morning.  You can image how my entire kitchen smelled like.

On a personal note, loved the cake a lot.  My son, who is never a cake lover was seen scampering back for a second slice.  As soon as the cake is out of the oven, the smell almost instantly wafted the entire kitchen and within seconds invaded the entire house.  Even cooling the cake for five minutes seemed too long a wait.  As soon as it was ready to be dug in, only then I remembered that I needed a photo shot.  So, this explains the rather messy and unorganised pictures. 


I particularly loved the texture of the cake.  The egg yolks and whites are separately whisked which gives the cake a slightly mousse-y consistency.  Be prepared, this cake is just goddamn smooth and moist.  It certainly has the melt-in-the-mouth effect but will turn a little denser after a day.  Having said that, it is still heavenly gracious!

I must credit this recipe to Christine of Christine's Recipes, whose cook book is currently selling like hot cakes within the Asian countries particularly Hong Kong, Singapore and Malaysia.  

Recipe
(adapted from Christine's Recipes)

Ingredients:

  • 250gm dark chocolate
  • 5 eggs, separated, at room temperature
  • 120gm caster sugar
  • 150gm unsalted butter
  • 50gm ground almond (almond meal), optional
  • Icing sugar, for garnish

Method:
  1. Preheat oven to 170C (335F). Melt chocolate, butter and sugar in a bowl over a pot of hot water at low-medium heat. After melting all ingredients, remove from heat, stir thoroughly to combine.
  2. Mix in ground almonds. Beat in the egg yolks, one at a time. (Note: Make sure the mixture is not too hot, as you don't want the egg yolks cooked at this stage.)
  3. Beat egg whites with slow-speed electric mixer for 2 minutes. Then turn to high speed and beat until the egg whites become very stiff and peaked.
  4. Fold in a few spoons of egg whites into the chocolate mixture to lighten it. Gently fold in the rest with small amount at a time for 3 times just until all ingredients are incorporated. Do not beat.
  5. Turn the mixture into a greased and floured 20cm round bakery tin. Bake for 40 to 50 minutes. Insert a needle to test the cake. If the needle comes out clean, it’s cooked through.
  6. Remove from the oven and let it cool completely on a wire rack. Dust with icing sugar to serve.

Friday, July 4, 2014

Chocolate Molten Lava Cake

Frankly, I have never eaten this cake before let alone baking one myself.  Of course, people around me have been lamenting how much they adore this cake and some even got hysterical and rhapsodic by just hearing its name, especially the words MOLTEN...LAVA!!

Certainly, I do concur that the name itself is already enticing enough to itch your taste buds and eventually making your mouth salivate and your heart yearn to try one.  That's what exactly happened to me.  I have been longing to try eating and baking one myself.

So, last weekend, I managed to squeeze some time out to do some readings trying to look out for a decent recipe.  Hey! The recipe is somehow pretty straightforward and not at all complicated.  The ingredients used are very basic and easily available.  The procedure is just a child's play as claimed by others.  Another shocking fact I found out from some of those who have made one - the bake was.........SHOCKINGLY EASY!!!  Any Tom Dick and Harry can whip one!

As easy as it has been said, this dunghead somehow failed on his first attempt.   Only on his second attempt then he realized that he was not cut out for this cake.  His third try was just as disastrous as the other two.  However, persistency wins at last.  Exactly, I finally succeeded on my fourth try!  The first three came out cakey and hard in that there was NO molten lava whatsoever sloshing out upon cutting.  Reason?  Easy,......I have overbaked it.  Even extra one minute counts and matters.  So, my advice for those of you who intend to bake one yourself, please make one piece first and see the outcome, only then you bake the remaining pieces.


So, what's my final verdict on the successful piece?  Frankly, I enjoyed better eating the failed cake which is hard and cakey.  So as my son, he loved the first three batches much more than the last successful one.  Though no lava, the cake just goes perfectly well with a dollop of vanilla ice-cream.  I somehow feel a tinge of guilt and uneasiness eating the seemingly 'uncooked' chocolate liquid that oozes out.  Anyway, that is just my personal intuition.  You may not agree with me.  I may be the odd ones! He he...

So, for those of you who want to try making one yourself, here you go babe, the recipe adapted from Foodie By Nature.


INGREDIENTS
(yields about 5-6 pcs)
  • 4.5 ounces of dark chocolate, finely chopped
  • 110 grams of butter
  • 3 large eggs
  • 3/4 cup castor sugar-approximate 150 gms (I reduced to 100g)
  • 1/4 cup all purpose flour(35 grams)
  • Vanilla extract 1 teaspoon
  • 5-6 moulds or ramekins depending on size
  • Chocolate powder

METHOD


  1. Preheat oven at 200 degrees C for half an hour
  2. Butter moulds and dust with chocolate powder so it sticks to the butter..tap away excess
  3. Put chocolate and butter in a double boiler whisking every now and then until melted. Add vanilla extract
  4. In a bowl whisk together eggs,sugar and gradually flour until well blended. Slowly add melted and cooled chocolate-butter mixture
  5. Pour mixture into moulds / ramekins and put in oven ( up and down grill on)
  6. Place in center of oven and bake for approximate 12 mins or until sides leave moulds and top is cracked but wobbly.  The time will vary from oven to oven..start checking after 10 mins (Mine baked at 9 mins)
  7. Remove and serve at once.have straight from the mould until u try it a couple of times..then you can start turning it upside down once you are more confident. Serve with vanilla ice- cream..

Friday, June 27, 2014

Chocolate Banana Cake


This simple cake really wowed me to the max.  It was indeed a real SURPRISE to see a bake that is soo soft and fluffy.  

Anyway, the moment the cake landed on my hands when I was unmoulding it, I already knew that it would be one hell of a good cake.  True enough, this babe is just gorgeously soft, light, moist and luscious.  Whatever it is, you just have got to try baking one to believe it.

After my successful and satisfying attempt trying her Chocolate Caramel Banana Upside-down Cake), I must give my credit, again to Joyce of Kitchen Flavours for sharing this amazing secret.  I am linking back her post and recipe here for your further read-up.   

Seriously, if you are free and want to find something to bake, do give this recipe a shot. Till then, have a great day ahead. 

Chocolate Banana Quick Cake
Makes one 9x5-inch loaf cake, serving 8

1-1/4 cups (5.3oz/151gm) all-purpose flour
1/4 cup (0.8oz/23gm) Dutch-processed cocoa powder
1 teaspoon baking soda
1/4 teaspoon salt
1/2 cup (1 stick/4oz/113gm) unsalted butter, softened
1 cup (7oz/200gm) granulated sugar
2 large eggs
1-1/3 cups (320ml) mashed ripe bananas (about 3 medium bananas)
1 teaspoon vanilla extract
1/2 cup (4.2oz/121gm) sour cream (I use yoghurt)
4 ounces (113gm) bittersweet chocolate, finely chopped (I use chocolate chips)


Method:

  1. Position a rack in the center of the oven and preheat the oven to 350F. Grease the bottom and sides of a 9x5-inch loaf pan.
  2. Sift together the flour, cocoa powder, baking soda, and salt into a medium bowl. Whisk to combine, and set aside.
  3. In the bowl of an electric mixer, using the paddle attachment, beat the butter at medium speed until creamy, about 1 minute. Gradually beat in the sugar and beat at high speed until well blended, about 2 minutes. At medium speed, beat in the eggs one at a time, beating well after each addition and scraping down the sides of the bowl as necessary. Add the mashed bananas and vanilla extract and mix at low speed until blended. Add the flour mixture at low speed in three additions, alternating it with the sour cream in two additions. Remove the bowl from the mixer stand and stir in the chopped chocolate. Scrape the batter into the prepared pan and smooth the top with a spatula.
  4. Bake the cake for 55 to 65 minutes, until a cake tester inserted into the center comes out clean (except for any melted chocolate). Cool the cake in the pan on a wire rack for 15 minutes.
  5. Unmold the cake onto the rack, turn right side up, and cool completely.
Store at room temperature, covered in foil, for up to 5 days.

Wednesday, June 18, 2014

Chocolate Caramel Banana Upside-down Cake

This recipe is definitely a keeper.   If you love caramel, banana and chocolate just exactly like I do, then this cake is seriously for you.  Bring this to any potluck gathering and I am positively sure this secret indulgence will be a crowd pleaser.

To me, chocolate especially dark rich chocolate just goes perfectly well with any ripe bananas.  These two ingredients really make good cakes as the flavour and aroma are just crazy.  More so, when the cake is drizzled with a slosh of caramel, oh my goodness gracious, the whole thing is just devilishly sublime.

Anyway, this recipe came to me by chance.  I was scouring around the net for a bak chang (Chinese dumpling) recipe when I accidentally spotted this secret.  I must thank Joyce of Kitchen Flavours for sharing this wonderful treat.  I strongly encourage that you visit her post here to view some close-up photos.  Indeed, looking at the photos was sufficient enough to make me go bananas.  I had to divert my ravenous eyes away (eerr from my bak chang recipe searching) and subsequently clicked in and explored the secret further.


I am pleased that I baked this cake as it helps to add on to my favourite and to-die-for collection of cake recipes.  The cake is chocolaty rich, moist and more importantly not overly sweet despite the caramel drizzle.  Wife likes it a lot and daughter loves it dearly too! But to me, it would have been even more perfect if I had added in some mashed bananas and chocolate chips into the cake batter, making the cake look even moister and taste more flavorsome.  Eerm, definitely going to try this the next round.

That's it, here you go, the recipe...  

Chocolate Caramel Banana Upside-Down Cake
(adapted from Joyce of "Kitchen Flavours")
Serves 8
For The Topping :
1/2 cup (1 stick) unsalted butter
3/4 cup packed light brown sugar
3 ripe bananas, peeled and cut into 1/4-inch thick slices


For The Cake :
3/4 cup plus 2 tablespoons unbleached all-purpose flour
6 tablespoons cocoa powder, sifted
3/4 teaspoon baking soda
1/4 teaspoon salt
6 tablespoons (3/4 stick) unsalted butter, softened
1 cup granulated sugar
2 large eggs
2 teaspoons pure vanilla extract
2/3 cup buttermilk (alternatively, you could also substitute it with 4-5 tablespoons milk and top up with homemade yoghurt to get 2/3 cup, as what Joyce had used)


Making the topping :
  1. Preheat the oven to 350F. Grease a 9-inch round non-stick pan.
  2. Heat the butter in a medium saucepan over a medium heat until foamy. Whisk in the brown sugar, turn the heat to low, and cook, whisking, for 2 minutes. Scrape the mixture into the prepared pan and smooth with a spatula. Arrange the banana slices in concentric circles on top of the sugar mixture. Set aside.

Making The Cake :
  1. Combine the flour, cocoa powder, baking soda, and salt in a medium mixing bowl.
  2. Combine the butter and granulated sugar in a large mixing bowl and cream with an electric mixer on medium-high speed until fluffy, about 3 minutes.
  3. With the mixer on low speed, add the eggs, one at a time, scraping down the sides after each. Turn the mixer to high speed and beat until the mixture is light and increased in volume, about 2 minutes. Stir in the vanilla.
  4. With the mixer on low, stir in 1/3 of the flour mixture. Stir in 1/2 of the buttermilk. Repeat with the remaining flour and milk, ending with the flour. Scrape down the sides of the bowl and beat the batter on high speed for 30 seconds.
  5. Pour the batter over the bananas, gently spreading it into an even layer.
  6. Bake until a toothpick inserted into the center comes out clean, 40 to 45 minutes. Transfer the pan to a wire rack and let stand for 5 minutes. Holding the pan and a plate together with oven mitts, immediately invert the hot cake onto the plate. If necessary, replace any fruit stuck to the bottom of the pan. Let the cake cool for 20 minutes and serve warm, or serve at room temperature. Store uneaten cake in a cake keeper, or wrap in plastic and store at room temperature for up to 2 days.

Friday, August 30, 2013

Fudgy Chocolate Almond Brownie


Basically, for those who are a newbie in baking like me, you may ask what is exactly the difference between a brownie and a cake?  Well to start it off, a brownie is a cross between a cake and a cookie.  To put it simply, it is flatter, denser and fudgier as compared to a cake which is taller and fluffier.

Brownies comes in a variety of forms, depending on its density.  Primarily, they are either the cakey type or the fudgy type.  Again, it all depends on personal preference.   For me?  I would choose the latter, and the gooier, the better.

Interestingly, there are some myths leading to the creation of this version of cake dessert. The first, that a chef accidentally added melted chocolate to biscuit dough.  The second, a cook forgot to add flour to the batter.  And the third, also the most popular belief, that a housewife who was baking a chocolate cake forgot to add baking powder.  When her cake did not rise, instead of tossing it out, she went on to serve the flat pieces to her guests.  This became a beloved treat of today.  Whatever may be the case, all three myths have lead to the 'birth' of this sweetie which eventually gained its very own popularity among cake lovers.

So, based on these myths, they sort of self-explain the distinct texture of a brownie: 

1. The higher ratio of butter to flour - makes the dessert
     fudgier and denser. 
2. The absence of baking powder - makes the cake flat.
3. The higher ratio of sugar used - makes the brownie gooier. 
4. The extra melted chocolate - makes it devilishly and sinfully chocolatey

This is my first time baking a brownie.  Personally, I find baking this treat relatively simple as compared to a cake.  Thank God, for once I don't have to bother whether the mixture is over beaten or under beaten.  I also need not care whether the ingredients are at room temperature or not, or whether the eggs are soft peak, stiff peak, hard peak or no peak!  The best part is, there is no mixer required, be it the stand one or the hand one.  It's pretty straightforward, just add and mix.

I adapted this recipe from Wendy of Table for 2....or more.  I deliberately added 20g of coffee powder to give the dessert the extra kick.  Indeed, the coffee gave a tinge of sweet-bitter taste.  Generally, I am quite pleased (though not totally satisfied) with the outcome considering this is my first time trying my hands out at this bake.  The only setback is the whole thing was not dark, gooey, fudgy and moist enough. 

After making the cake, I went on to scour through the net about the perfect brownie and incidentally this blog here from Eva Bakes piqued my interest.  It seems that she has made quite a few variations of brownies and all of them looked so amazingly tempting - dark, moist, gooey and fudgy! 

Anyway, here's the recipe I used.....

The Recipe:
250gm dark chocolate
100gm butter
100gm sugar (I find it a little tad too sweet, so pls reduce accordingly)
1 tsp vanilla extract
20g coffee/espresso powder
3 eggs
60gm all purpose flour
100gm chocolate chips
100gm white chocolate chips (I do not have any, so I use the chocolate one, so altogether 200g of chocolate chips)
Small handful of almond (optional)

Method:
1. Preheat oven at 140/160C. Line an 8 inch shallow
    square pan.
2. Place dark chocolate and butter into a mixing bowl.
    Place mixing bowl over another bowl of hot water and let the butter and chocolate melt,
    stirring gently.
3. Remove mixing bowl from hot water and mix in sugar, vanilla extract and coffee powder.
4. Put in eggs and mix.
5. Sift in flour and mix.
6. Put in 2/3 of both choc chips and nuts and mix.
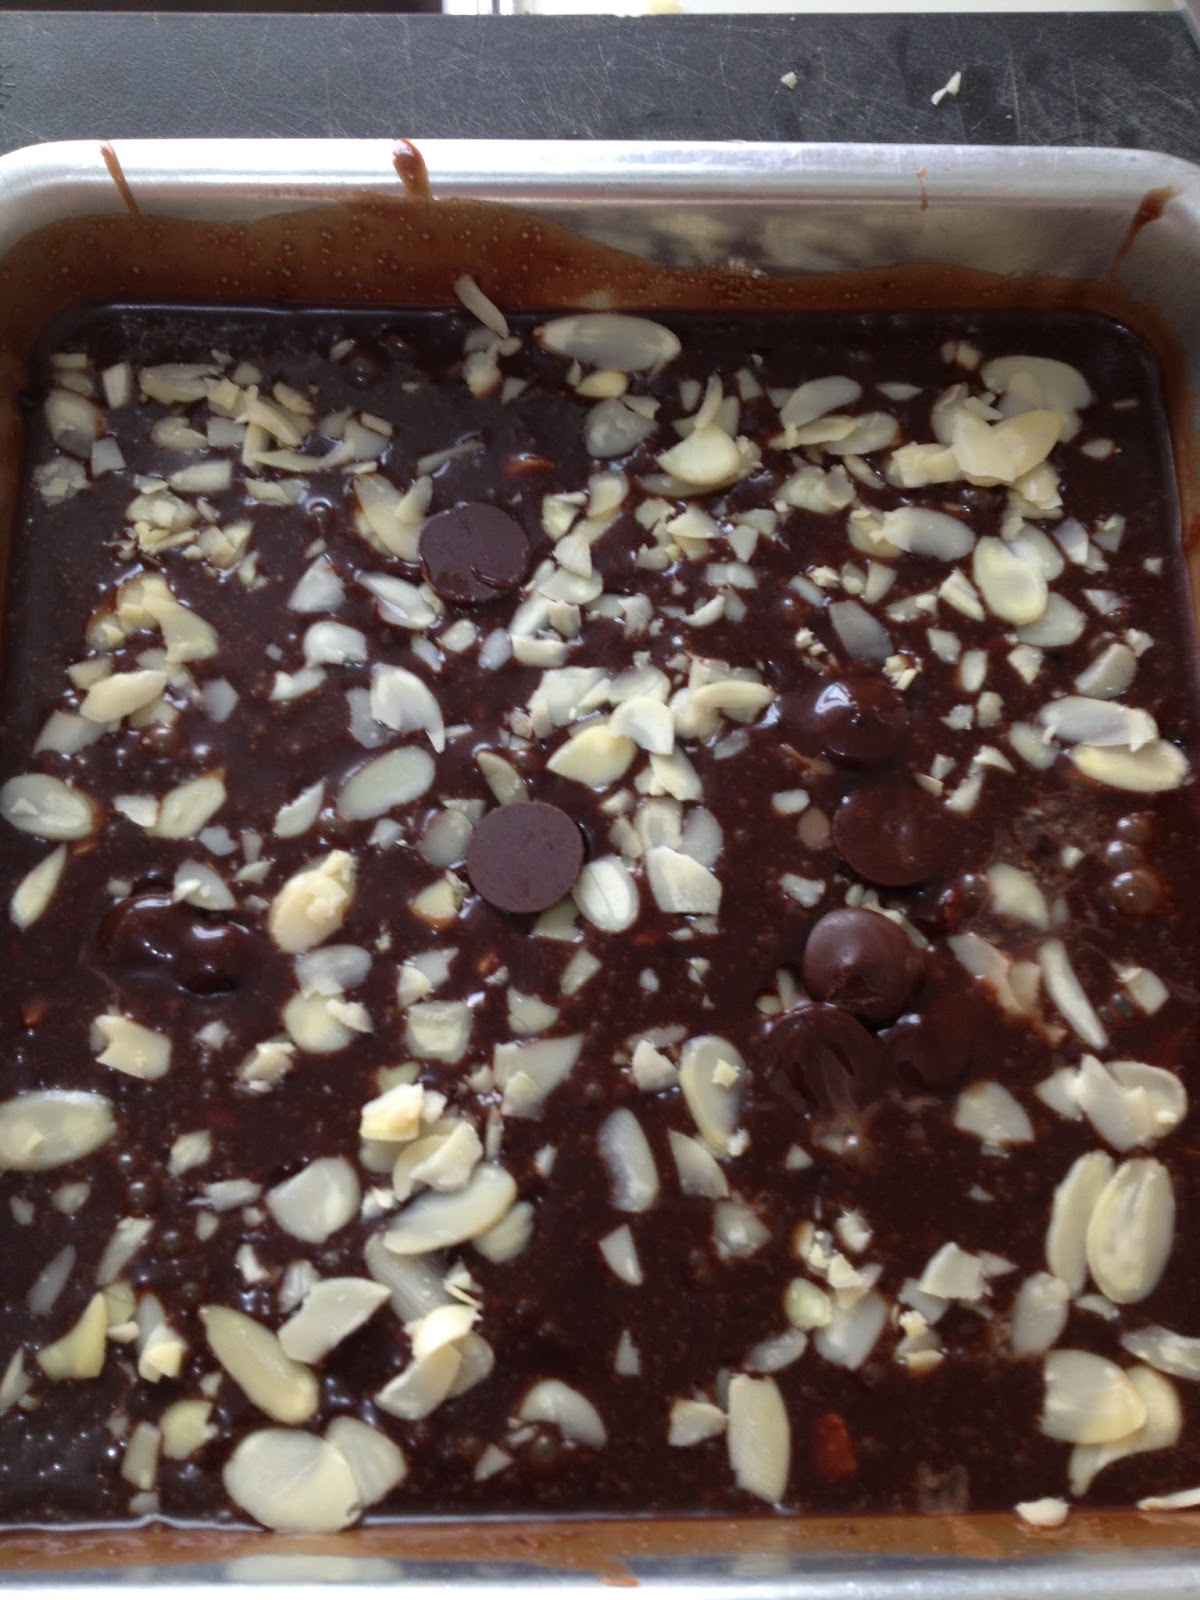
7. Pour batter into pan and sprinkle balance of almond nuts and choc chips.
8. Bake for 35- 40 minutes or until skewer comes out clean.
 

Happy Trying!!

Thursday, June 13, 2013

Moist Chocolate Cake

For those who crave for chocolate cakes, I strongly feel that this recipe is worth a keeper.  I found it in one of the leading food magazine in Malaysia - Flavours. Well, it was back in 2009 when I gave a shot making my first ever chocolate cake.

By some strokes of luck, surprisingly, I managed to find my way and pull it through.  There it was, a good-looking, soft, fluffy, moist, dark-colored 'thing' standing elegantly on my white ceramic dessert plate.  For days, the cake accompanied me, satisfying my taste buds when I was alone resting leisurely on my couch in front of the telly enjoying my evenings.  

Then, disaster struck when I found out that I had misplaced my magazine.  After a futile search, I caught hold of my maid and made a baseless accusation that she must have mistakenly placed it somewhere in the piles of old newspapers which I had just sold them for recycling.  Arrggh!

I tried to search through the net for another similar ones but in vain.  Finally, I gave up and somehow managed to come to terms with the loss.


Approximately three weeks ago, my eleven-year-old boy, Bryan came running to me saying that he had found the magazine, hidden under the drawer of the coffee table. Thank God! Phew!

Barely a week after my rekindling with the magazine, I whipped out another cake and the following week, another one.  Well,  two in a row is definitely enough and it could turn out to be a bit cloying eating it every day.  So, I thought it is high time that I share it out here especially for those chocolate cake lovers who want to try your hands at making one yourself.  Trust me, your can't go wrong with it!

One thing I like about this recipe is that it calls for coffee powder in both its cake and icing, giving it a tinge of bitterness and making the whole cake taste flavourful.

This recipe is shared by Arlene Diego, who teaches cake baking and Filipino cuisine in Damansara Jaya.  The cake is based on the American Chocolate Cake, made popular in the Klang Valley by the La Manila Cake House in the 80s.

                                                                      Arlene Diego

The Recipe:

Chocolate cake
330ml   fresh milk or water
60g       cocoa powder
1 tsp     vanilla extract
1 tbsp   instant coffee powder
180g     butter, softened
330g     caster sugar
3           eggs, grade B
190g     superfine flour, sifted
1 tsp     bicarbonate of soda, sifted
2 tsp     baking powder, sifted

Chocolate icing
700ml   fresh milk
300ml   condensed milk
2 tbsp    instant coffee powder
2 tsp     vanilla extract
85g       cocoa powder, sifted
6 tbsp   all-purpose flour, sifted
3 tbsp   cornflour, sifted
3 tbsp     cold butter


To prepare cake:
Preheat oven to 180 degree Celsius.
Line two 9" round cake pans with parchment paper.
In a bowl, combine milk, cocoa powder, vanilla and coffee.  Mix and set aside.

In a stand mixer, cream butter and sugar together on medium speed until light and fluffy.
Add eggs one at a time, beating to combine

Add sifted mixture alternately with the liquid mixture,  beginning and ending with flour.
beat until smooth, scraping down the sides of the bowl.

Divide batter equally among the prepared pans.
Bake for 18-20 minutes. Remove from oven and cool completely in the pan.

To prepare the chocolate icing:
In a heavy-based saucepan, place all the ingredients except the butter.
Cook over medium heat, whisking continuously until smooth and thick.
Add butter, stir to combine.
Remove from heat and set aside to cool completely.

To spread icing: 

Remove the cake from the pans.
Spread a layer of the cake evenly with half the chocolate icing, top with the remaining layer of the cake.
Spread top and sides of cake with remaining chocolate icing.
Use a cake comb or fork to form a decorative pattern.


HAPPY TRYING!!