Showing posts with label Nyonya. Show all posts

Tuesday, October 21, 2014

Udang Masak Lemak Nenas, a Nyonya Classic


Masak Lemak Nenas is another quintessential nyonya dish, a must-try dish when you attempt to explore nyonya cuisine.  You walk into any nyonya restaurant, this dish is undeniably one of THE dish that the waiter will highly recommend that you order.     

The sweetness from the pineapples and prawns, the saltiness from the salted fish, the creaminess from the coconut milk, the spiciness from the chilli paste coupled with the extra tang from the lemongrass, galangal, tumeric and ginger all of which just blend so perfectly, giving the whole dish a good balance, guarantee to please and satisfy your palate to the max.  This is indeed a dish your taste buds will thank you dearly.


Needless to say, this has always been one of my top favourite nyonya dish and my classic comfort food until today. Masak Lemak Nenas is always served with steamed white rice.  For my personal preference, I always complement it with sambal belacan (another must-try nyonya-style chillie paste) or sambal cili garam (another classic Nyonya sambal).  Like most nyonya dishes especially if they are gravy based, we the Peranakans (the Sraits born) will always eat using our five fingers as we can practically lick each of them if the dish is good.  Oh, I'm drooling now!!

Now, let's get down to the recipe.....

Ingredients
  • 200g prawns
  • 150g pineapples, sliced
  • 2 cups of coconut milk
  • 3 cups of water 
  • 1 salted Ikan Sepat (Gourami fish)
  • sugar
  • salt
  • oil to fry
  • 3 kaffir lime leaves (optional), I omit this
  • 1 teaspoon of tamarind paste
 To blend (A)
  • 10 fresh chillies, I used about 6 as my family can't really take too spicy
  • 15 shallots or a palm full
  •  3 pips of garlic
  • 1/2 inch of galangal
  • 1/2 inch of turmeric
  • 2 stalks of lemon grass, sliced
  • 3 candlenuts
  • 5g of belacan (shrimp paste)

Steps to prepare

  1. Toast belacan over fire or on a dry pan until fragrant.
  2. Blend all ingredients in (A). Add some water to ease blending process.
  3. Add oil to pan and fry (A) until fragrant. When it’s fragrant, the paste will change into a darker shade of red.
  4. Add water.
  5. Add pineapples and allow to simmer for 5 minutes.
  6. Then, add coconut milk. Make sure the fire is small and keep stirring or else the gravy will turn lumpy.
  7. Add prawns, ikan sepat, tamarind paste and sugar. Wait until prawns cook.
  8. Finally, switch stove off and add kaffir lime leaves. Stir evenly and serve.

Tuesday, May 27, 2014

Nyonya Chang


Here it is my very first bold attempt making this traditional Chinese classic or zongzi in Mandarin, chang in Hokkien and dumpling in English.  Frankly, I can't really believe that I have come this far making changs.  What satisfies me the most is I went about doing everything on my own without the accompaniment of any experienced elder.  I was all alone throughout the whole making process from buying the ingredients, cutting the meat, making the filling, tying the dumplings to boiling them.  To tell you the truth, I've never bought pork from a butcher before and obviously communicating with the not-so-friendly rough-spoken Chinese butcher in Mandarin is quite a daunting task for me.  I didn't even know what is pork belly called in Mandarin but luckily Google Translate saved the day. 

Of course, I find wrapping and tying the dumplings the most challenging task.  It all happened on a dark stormy night when rain was beating like bullets, lightnings were flashing rather frighteningly and thunders were booming angrily, I was all alone sitting in my living room wrapping and tying my dumplings.  Hey, I'm not making up the whole scene okay but coincidentally this was what exactly happened that night.

After my wife and kids slept, I went downstairs, quickly set up my work station and began wrapping my dumplings accompanied by nobody except for a few virtual elderly aunties who appeared on my laptop screen showing me the way to wrap and tie the dumplings.  While wrapping I was looking at the demonstration video clips via YouTube.  Very true, it's easier seen than done!  Immediately, I felt like giving up.  The first dumpling I tied crashed down on the floor scattering all the grains and fillings.  At that spur of the moment, my heart crushed and a surge of loneliness sipped in.  While I was cleaning up the mess, suddenly I thought of my mom.  How I wished she was beside me showing and guiding me how to tie dumplings.  However, I went on to pick the bits and pieces of the grains including my crushed heart.  Staying strong, I continued and and eventually pulled it through.  I am now on my third batch of my dumpling making project. Yipee!


Okay, now back to my nyonya dumpling.  I chose this recipe simply for the reason that it was Amy Beh's, a well-known celebrity chef and newspaper columnist in Malaysia.  With her accolades, I  thought how wrong could I go with her recipe?  Browsing through the ingredients and after having a word with my tua ee (eldest auntie), YES I was on the right track.  Based on my tua ee's input, I made slight modification to the recipe.  I made it sligthly more flavourful after I was told that the taste would be blander during the boiling process. 

Overall, I am absolutely glad that everything particularly the taste turned out well.  I benchmarked it with my tua ee's dumplings and what I got was to me that of what I have been eating all these years.  However, one setback, mine was not as nice-looking as that of my aunt's.  Hers was clean-looking with a striking blue hue on top whereas mine was rather murky and not that appetizing.  So, this leaves me with lots of rooms to improve.


Recipe - Nyonya Chang
Source : Kuali.com (Amy Beh)
Yields approximately 15 big dumplings

Ingredients

  • 700g glutinous rice 
  • Some screwpine leaves, cut into 4 cm lengths
  • Dried bamboo leaves, washed and boiled until soften 
  • Hemp strings for tying
  • 2 tbsp salt
  • 1 tbsp sugar
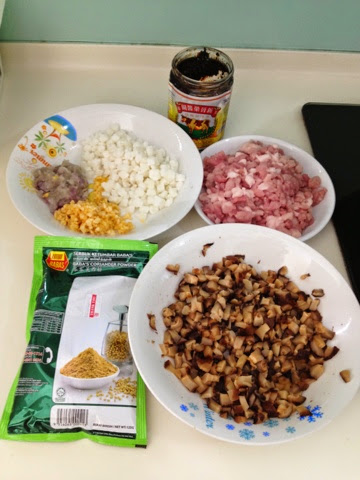
Filling
  • 5 shallots, minced (I used 7 shallots)
  • 2 tbsp chopped garlic
  • ½ cup oil 
  • 3 tsp preserved soya bean paste (tau cheong)
  • 7 tbsp coriander powder (ground ketumbar), mixed with 170ml water into a paste (increased to 8 tbsp)
  • 450g belly pork, skin removed and cut into very small cubes
  • 12-14 dried mushrooms, soaked and diced
  • 100g candied winter melon, diced (increased to 150g)
Seasoning (combined)
  • 3 tsp pepper
  • 5½-6 tbsp sugar or to taste (replaced with brown sugar, 6-7 tbsp)
  • 1 tbsp thick soy sauce (2 tbsp)
  • 1 tbsp light soy sauce (2 tbsp)
  • 2½-3 tsp salt or to taste
  • ½ tsp ground black pepper

Method

To prepare rice (I apportioned the rice to tinged some blue with the blue pea flower)
  1. Boil some water together with 30 blue pea flowers to get blue tinged water.
  2. Soak 200g of the rice with this water for at least 3 hours.
  3. Soak the rest of the rice with water at the same time.
To prepare the filling
  1. Heat oil in a non-stick pan, fry shallots and garlic until aromatic. Add soya bean paste and coriander paste. Fry until fragrant.
  2. Add pork, winter melon and mushrooms, and mix in combined seasoning. Fry until pork is heated through. Dish out and set aside.
To assemble the dumplings
  1. Drain the glutinous rice and briefly rinse the rice.
  2. Overlap 2 bamboo leaves lengthways then fold into a cone. 
  3. Fill in this order into the cone-2 tbsp blue glutinous rice, 2 tbsp filling, 2-3 tbsp white glutinous rice.
  4. Cover with a piece of screwpine leaf. Press down to compress the dumpling. Wrap into a pyramid shape. Tie tightly with hemp string to secure. Repeat until all the ingredients are used up.
  5. Bring a large pot of water to a boil. Add salt and sugar then put in the dumplings and immerse them completely. Cook in rapidly boiling water for 2-2½ hours. Remove the dumplings and hang them to drain off excess water.

Monday, April 21, 2014

Ondeh-ondeh

 This is another classic dessert in Malaysia and Indonesia and very popular among the Malays and Peranakans.  It is called ondeh-ondeh in Malaysia but klepon in Indonesia.  It is basically a boiled rice cake, shaped into balls, stuffed with gula melaka (palm sugar) and rolled in fresh grated coconut.  Eaten as morning or afternoon snacks, this traditional dessert is very much liked by many, both locals and tourists.

Eating a ball of ondeh-ondeh can be quite suspenseful but delightfully satisfying.  When the ball is stuffed into the mouth, one is already anticipating that it is going to literally burst in any seconds.  Upon bursting, the palm sugar liquid is explosively oozed out from the ball sending a pleasing sweet sensation to the whole palate. 

I made this at home a couple of weeks back, after my successful attempt getting my daycare students to make ondeh-ondeh during the school holiday.  Though it was our first trial making this dessert, the outcome turned out to be surprisingly good receiving lots of thumbs up from the students and teachers alike.  I got the recipe from Mrs Tan, the cook for my daycare centre who is married to a Baba and loves exploring Nyonya cuisine.  A big THANK YOU to you, Mrs Tan!

One thing I like about this simple recipe which made my students ooh and aah that day is it calls for sweet potato, the secret ingredients that made the balls so wonderfully soft and smooth.  So, if you want to give this classic indulgence a try, here you go.......scroll down!


The Recipe:
(yields about 40 to 50 pcs)

350g glutinous rice flour
250g sweet potatoes
3 tbsp pandan juice (screwpine leaf juice)
1/2 tsp salt
3/4 cup plain water

200g gula Melaka (palm sugar), finely chopped
1 fresh grated coconut


Method:


1.  In a heavey saucepan, boil the sweet potato until soft and tender. Then, mashed and set aside.

2.  In a large bowl, combine the glutinous rice flour with Pandan juice and water.
     Then, knead lightly.

3.  Combine the dough with the mashed sweet potato and knead.

4.  Bring a pot of water to boil. Pinch a small piece of dough (about 15 g each) and flatten lightly.
     Fill the center of the dough with palm sugar.

5.  Roll them in your palm to form a smooth ball and cook the glutinous rice balls in the
     boiling water. When the rice balls float to the surface, remove them with a slotted spoon
     and shake off the excess water.

6.  Mix the grated coconut with a pinch of salt and steam for about 2 – 3 minutes and let it
     cool completely.

7.  Coat the rice balls with grated coconut and serve immediately.


HAPPY TRYING!

Thursday, April 17, 2014

Apom Bokwa With Banana Gravy

This is indeed a typical Baba-Nyonya (Straits-born Chinese a.k.a the Peranakans) dessert that is stepping into 'extinction'.  I only got to eat this whenever my septuagenarian aunt (tua ee) makes it.  I reckon that to many, especially those born in the 80s and below, this dessert is a childhood food that is bound to take you stroll down memory lane.

As a matter of fact, not many nyonyas now know how to make this classic cake (and pardon me, I am referring to today's young modern nyonyas, k!).  So, this accounts for the fact that this traditional kueh (cake) is so hard to come by nowadays.  As a Baba who currently lives in Malacca and loves cooking, I feel called to revive this dying classic.

Well, it all started when I was browsing through my Facebook News Feed a couple of days ago and suddenly someone posted a photo of this dessert.  It caught my eyes almost instantly.  Scrolling down on the comments made me realize that there were so many, both Malaysians and Singaporeans still craving for this dessert.  At the drop of a hat, I googled for the recipe.  Surprisingly, not many I could find except for Amy Beh's, an iconic figure where nyonya food is concerned.

I could have asked my tua ee or even my mummy for the recipe but I doubted they have it written down.  One thing for sure, they will confuse me with their 'agak-agak' (roughly) statement.  Whatever it is, come to think of it, my hats off to these elder nyonyas, anyway.  They just have all their recipes stored in their head without having to refer to any cook books. Just imagine how many of them and if you are a Straits-born, you will agree with me that Peranakan dishes are relatively complicated to prepare incorporating varieties of ingredients and spices.  Even their methods are not that straightforward.  And yet, all these are cleverly stored in their grey matter. RESPECT! RESPECT!

So, how's the verdict of Auntie Beh's recipe and my labour of love?  Generally, I'm very satisfied with what came out.  Though a little complicated with lots of steps to follow, I am indeed pleased with the outcome.  What I heard and gathered from my aunt and a few other elders was that to know as to whether you have succeeded in making the apom (pancake) or not was to look at the the tiny punctures on the surface of the apom.  The more the holes, the better the pancake.

And taste wise? Well, it was surprisingly close, though not exactly the same to that of my auntie's apom.  There is a slight tinge of sourish in the apom.  It could be from the yeast (I guess so, maybe someone can shed some light here!).  From my observation, the longer the rice batter is fermented, the sourer the pancake turns out to be, and the more the holes will form!  Anyway, not to worry, when the apom is dipped and blended together with the sweet banana gravy, it neutralizes everything and the result............HEAVENLY!


So, here I come, bringing you Amy Beh in the house, virtually......
 
Ingredients
By Amy Beh

I) The Cake/Apom
    (A)  Mix these ingredients together and leave aside to soak for 10 minutes:
            - 500g rice flour (I reduced it to 300g.  500g is just too much making it impossible to soak)
            - 25g glutinous rice flour
This is EBU
            - 300ml coconut water

     (B) Mix these ingredients, leave aside for 15 minutes.  Cook over 
           low flame until it turns gluey to make "Ebu":
           - 50g rice flour
           - 150ml water

     (C) Mix these ingredients and leave aside to froth:
            - 1/4 cup lukewarm water
            - 1/4 tsp sugar
            - 1 tbsp instant yeast
    
      (D) - 160ml pati santan (thick coconut milk)

II) The Sauce: 
      (A) Prepare the syrup
             - 75g brown sugar
             - 50g gula melaka
             - 175ml water
             - 3 pandan (screwpine) leaves 
       (B) Mix these ingredients together and allow the rice to expand:
             - 2 tbsp glutinous rice flour
             - 25ml water

       (C) - 50ml pati santan
             - 1/4 tsp salt
         
       (D) - 3 rippen bananas
     
  Method:

    Blend ingredients (a) and (b) together. Mixin 1/2 tsp salt and stir well with a hand whisk. Add in (c) and set aside for 30 minutes. Cover with a damp cloth for it to rise to double its size. 
    Blend in (d) and proof for another 50 minutes. Heat a brass apom mould and grease lightly with corn oil.
     
    Pour in enough batter to fill the mould three-quarters full and cook over medium heat. Cook till bubbles appear. Cover mould with a lid till the top part of the apom is cooked. Touch centre of apom with finger - if it is firm and not sticky, the apom is ready.
     
    To make sauce: Bring (a) to a boil, strain the hot syrup into (b). Stir well and transfer to a saucepan and cook over medium low flame. Add in (c) and (d) and stir well till sauce thickens. Pour sauce into a small bowl and serve with apom bokwa.
HAPPY TRYING!

Saturday, August 24, 2013

Melt-in-the-mouth Pineapple Tarts - Enclosed Version


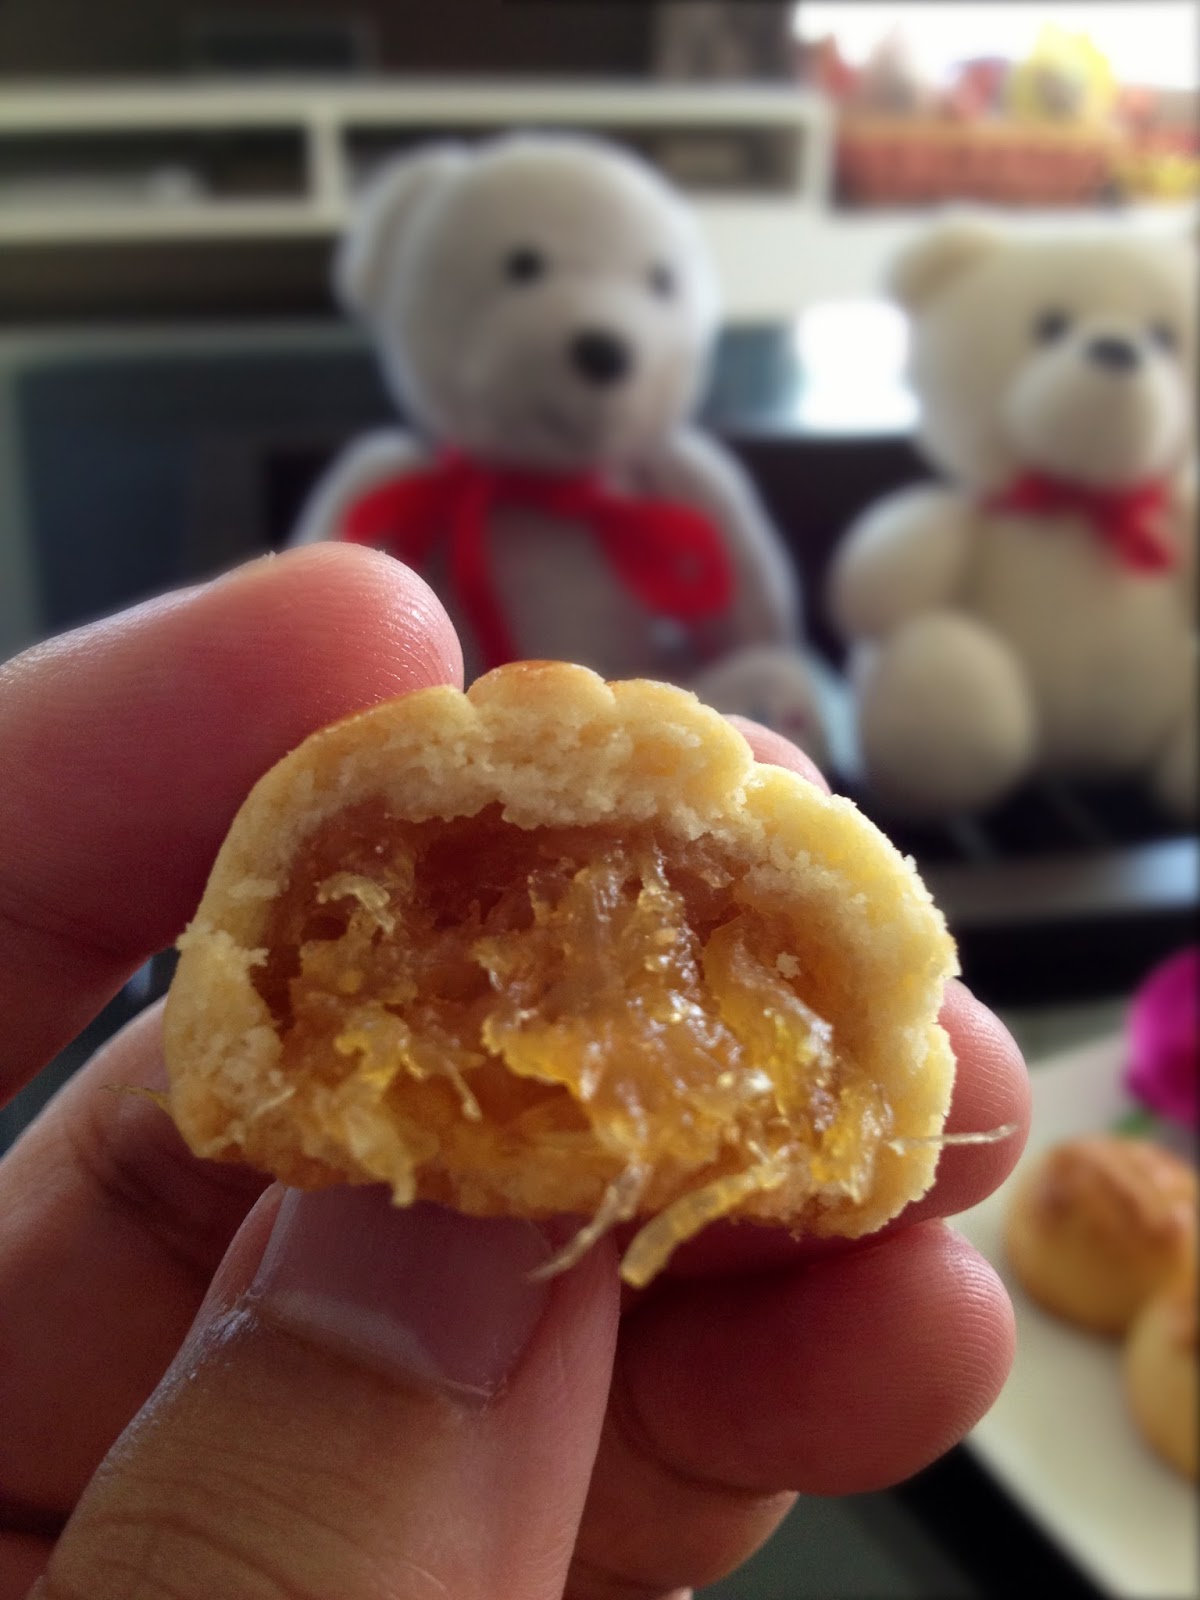
Barely two months after I last blog about pineapple tarts, here I come again, with another version of this glorious sweetie!  This time round, it is the enclosed type.

Having grown  up eating loads and loads of homemade traditional Nyonya pineapple tarts which characteristically has its filling exposed, this bull-headed soul was just too dogged to recognize any other variations of the tart.  He was just too arrogant to even try them and to him, as though the open type was the ONLY one existed in this whole wide world. 

Thus, it comes to no surprise if I say this is my first time eating this version of pineapple tarts, apart from the Taiwanese Pineapple Cake which coincidentally also has its filling enclosed.

Taiwan Pineapple Cake
Malaysia Pineapple Balls
Thanks to Sonia of Nasi Lemak Lover, whose excellent and insightful posting on the enclosed version of the tart finally tamed down my arrogance and brought me a step closer into the realm of pineapple world.

What drew me into reading her posting and experimenting the tarts myself were basically because of these two factors:

  a) it is super-duper straightforward which only calls for four ingredients, yes ONLY 4, and they 
      are bu---, con----, f----- and e---.

  b) it is the best melt-in-the-mouth pineapple tart version though you may have your melt-in-
      the-mouth recipe

Huh?? Sure or not, Sonia??  Well, after taking my first bite, I would have to take my hat off.  You are absolutely correct!  The tarts are freaking melty!  Unquestionably, it is by far the best that I have ever tasted, too!


So, here it is, the secret reveals.....

Ingredients:

350g butter
100g condensed milk or sweetened creamer
510 plain flour
2 egg yolks

700g pineapple filling (homemade or store-bought).
You may find the recipe in my previous post here if you intend to make your own.

1 egg yolk + 1 tsp milk, for egg wash

Method:
1. Cream butter and condensed milk till light.
2. Add in egg yolk one at a time, and beat until combine.
3. Mix in flour to make a dough. Make sure it's not sticky.
4. Refrigerate for about 30 minutes.
5. Meanwhile, roll pineapple filling into balls
6. Flatten a piece of dough and place a ball of the rolled pineapple 
    filling in the middle.  Bring the edges of the dough together and 
    press lightly to seal.  Gently roll the ball on the surface of your
    table top so that the surface of the ball is smooth and neat.
7. Glaze the rolled balls with egg wash.
8. Bake in the preheated oven at 165C (fan forced) for about
    20 mins or till golden brown.
9. Cool completely before storing.


Happy baking!

Thursday, July 25, 2013

Ayam Buah Keras (Candlenut Chicken)


I never know that candlenuts can become one of the main ingredients in a dish.  As far as I know, candlenuts (or in Malay it is called buah keras) are used in traditional Asian dishes (mainly in Malaysia and Indonesia) to thicken sauces ie satay and sambal.  The nut is similar in flavour (though much bitter) and texture to a macadamia nut, which similarly has a high oil content.

Buah Keras / Candlenuts

The other day, I was browsing through for a nyonya chicken curry recipe that my late mother used to cook for me and incidentally I stumbled upon this one over here from My Kitchen Snippets.  At one glance, it looked similar to the recipe that I was looking for.  I clicked, went in and instantly had my heart set on cooking this dish, of course still assuming that it was THE recipe I was looking for.

However, in the midst of preparing the dish, I realized that I was cooking something else.  While dishing out onto the plate, I knew that it's gonna be a good one, based on the texture, consistency, color and aroma.

Then came the moment of truth!  My wife took her first bite..........mmm, okay-lah, cukup rasa (tasty enough)!  As her usual self, always stingy with her compliments, I still could not assume the dish had convinced her.........U-N-T-I-L she took the second piece.  PHEW!!  I gave out a small sheepish smile.

In the evening, on the dining table, my eldest who had just come back from school tried the dish together with steamed rice.  After his last spoon, he went up straight to my wife and blurted out..........."mummy, can you please ask papa to cook some more?"   


So, here it is, two 'likes' from two of the most important people in my family.  Humbly, I have somehow succeeded in this dish that I feel it's worth trying if you are looking for a nyonya chicken dish.....yes, Ayam Buah Keras/Candlenut Chicken.

The Recipe:

The ingredients:

Kaffir Lime Leaves
600g chicken, cleaned and cut into small pieces
Candlenut paste (please refer to the recipe below)
1 Lemongrass, slightly smashed
2 pcs Kaffir lime leaves
3/4 cup of water
Salt to taste
Sugar to taste


Method:
1. Heat about 4-5 tablespoon of oil and put in the candlenut paste and fry
     until fragrant (this normally take about 10 minutes).  Use low to medium
     heat and be careful not to burn the paste.
2. Add in the chicken pieces, kaffir lime leaves and lemongrass  Coat the chicken
    with the paste and keep stirring until the chicken turns opaque.
3. Add in salt, sugar, and some water and stir every now and then.
4. Cook until the chicken is done and gravy thickens slightly.  If the chicken is not
    cooked but the gravy is starting to dry up, you can add more water.
5. Dish out and serve.

Preparing the Candlenut Paste:
   100g fresh chilies (about 10 pcs)
   5 candlenuts
   100g shallots (about 10-12 pcs)
    8g fresh turmeric/kunyit hidup (about 2 inches)
    10g shrimp paste/belacan
    oil
    water

Method:
1. De-seed the fresh chillies if you do not like the paste to be too spicy.
    Cut the chillies, shallots and turmeric for easy blending.
2. Put all the ingredients into a blender and add a little water.  Blend
    into fine paste and set it aside.

BON APPETITE!

The nut is similar (though “rougher”) in flavor and texture to the macadamia nut, which has a similarly high oil content. - See more at: http://theepicentre.com/spice/candlenut/#sthash.cVQyqKJU.dpuf
The nut is similar (though “rougher”) in flavor and texture to the macadamia nut, which has a similarly high oil content. It is mildly toxic when raw. - See more at: http://theepicentre.com/spice/candlenut/#sthash.cVQyqKJU.dpuf

Tuesday, July 23, 2013

Nyonya Pulut Inti

My brother in-law gave us a packet of uncooked glutinous rice, specially brought back from Singapore.  He reckoned that it was of a high graded one.  As a matter of fact, we have never had any glutinous rice in the house ever since we shifted in 5 years back.  Besides, we have never cooked it either and certainly none of us knows how to exploit it.  So, whether it is high graded or low graded, it does not matter to us even a wee bit. Anyway, thanks to you, bro!

Not knowing what to do with it, my wife, again gave another of her brilliant suggestion.

"Why don't we make pulut inti!"  

"Yeer, so simple" was my only response.

Uninterested, I did not bother to ask her any further and just walked away.  After a few reminders, I finally gave in.  Hesitatingly, I googled search for the recipe and did a little bit of reading.  Little did I realize that I began to lurve and appreciate this classic Nyonya  kuih.

As a Melaka-born Baba, I used to eat this kuih when I was young.  It has been quite some time since my mom and tuah ee (aunt) last made this kuih.  As a kid (even till now), I did not quite crave for this delicacy simply because I was just too lazy to unwrap the banana leaf which would always make my fingers sticky and messy. 

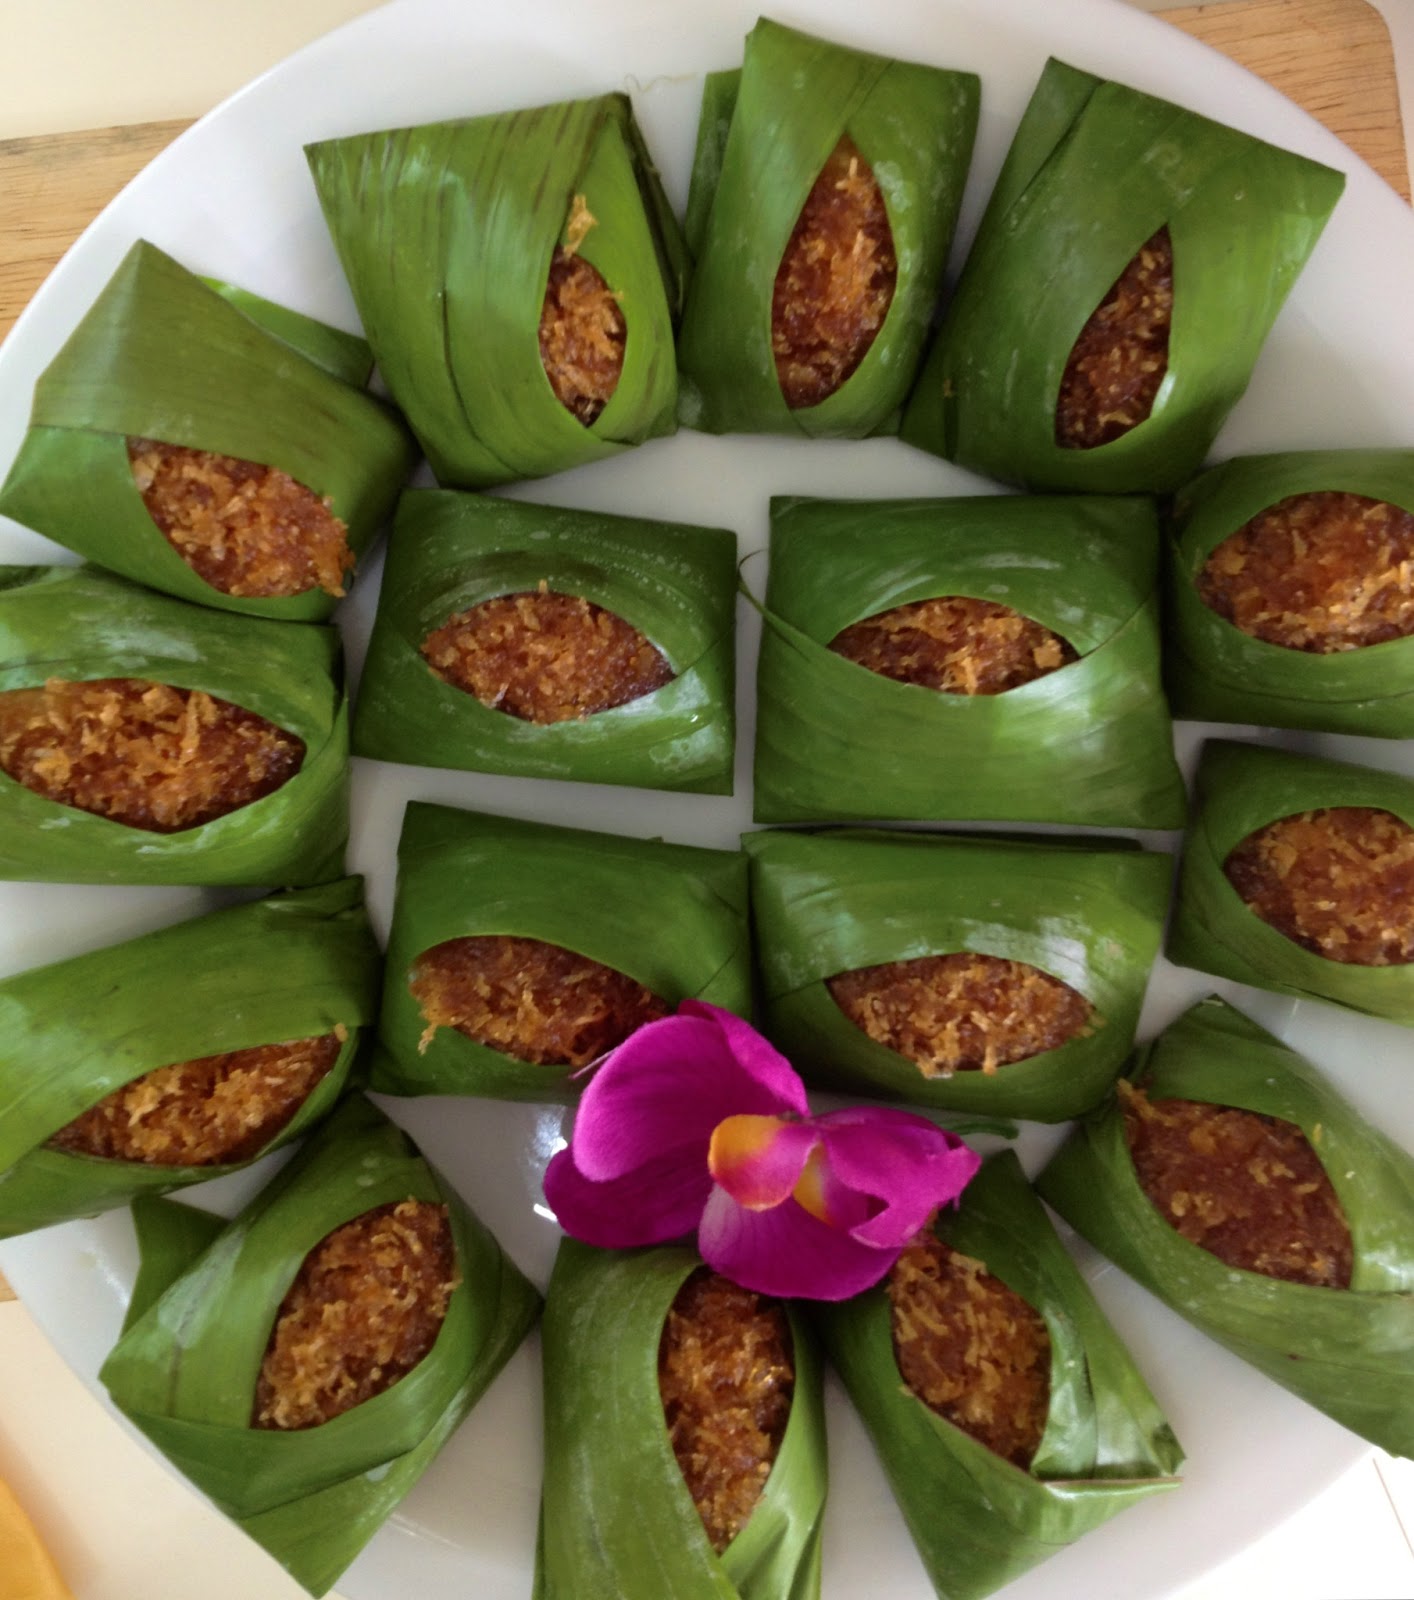
Basically, pulut inti is made of steamed glutinous rice with coconut milk and eaten with dessicated coconut filling caramelized with palm sugar and it's all wrapped in a banana leaf.  "Pulut" means glutinous rice and "inti" means the filling.  The original version of pulut inti will have its pulut soaked with bunga telang (or Blue Pea flower in English) to give the rice a sweet pastel blue hue.  Since I had totally forgotten to hunt some, I would have to settle for the plain colorless rice.

 Bunga Telang (Blue pea flower)

Generally, I find making this legendary kuih so much fun and most importantly, it's so nyonya......


Pulut Inti Recipe
(I adapted this recipe from nyonya food -
http://nyonyafood.rasamalaysia.com)

A) The Pulut

15 dried Blue Pea Flowers
1/4 cup of hot water
300 g glutinous rice
230 g thick coconut milk
1/2 tsp salt

Method:
  1. Soak blue pea flower in hot water for 15 minutes till water turn blue. Sieve the water out.
  2. Soak the glutinous rice in blue pea flower overnight or about 6 hours.
  3. Steam glutinous rice in steamer for about 25 minutes or till rice is soft.
  4. Mix coconut milk and salt. Add into steamed glutinous rice and continue to steam for another 10 minutes.
  5. Remove and leave to cool.
  6. Serve with coconut filling.
 B) Coconut Filling
     150 g brown sugar / palm sugar
     3 Tbsp sugar
     1 pandan leave (knotted)
     1 grated coconut (white part only)
     80ml water
     1Tbsp cornflour mix with 1Tbsp water

Method:
  1. Break the brown sugar/palm sugar into small pieces. Combine with the sugar, pandan leave and water. Cover over a medium flame until sugar dissolves.
  2. Add in grated coconut and stir till fragrant.
  3. Add conflour mixture and stir for 2 minutes. Leave to cool.

Hope you will like this recipe!

Happy Trying!!

Thursday, July 18, 2013

Traditional Chicken Rendang


On our way hunting for breakfast two days ago, my wife suddenly craved to eat rendang ayam (or chicken rendang) and asked me to cook.  Any particular reason? I have no idea.  What I could think of, it's probably due to the Ramadan month fever (fasting month for the Muslims) where food bazaars, displaying all kinds of traditional Malay food and snacks are prominent at almost every nook and cranny of the town.  As the Hari Raya Aidilfitri festival (a new year festival celebrated by the Muslims after observing a-month long of fasting period) is fast approaching, the smell of ketupats and rendangs, which are synonymous to the celebration begins to fill the festive air.   

So, immediately after breakfast we headed to the nearby market to get the ingredients needed.  As soon as wife got down from the car, I remained in and started googling for the recipe on my mobile phone.  After just a few clicks, I caught sight on this particular one here and bingo!  Barely 10 minutes, we were already in the car heading back home. 

Basically, rendang is a caramelized curry cooked with either chicken, beef or mutton.  This is a spicy meat dish originated from the Minangkabau ethnic group of Indonesia to serve at ceremonial occasions and now a popular Malay staple in Malaysia.  Rendang is often served with steamed rice, ketupat (a compressed rice cake), or lemang (glutinous rice barbecued in bamboo tubes).  It is a must-have dish in every Malay house during Hari Raya Aidilfitri festival.

Interestingly, in 2011, an online poll by 35,000 people held by CNN International chose Rendang as the number one dish of their 'World's 50 Most Delicious Food' list.  Wow, what a revelation!

Cooking rendang is time-consuming and requires patience.  The meat pieces are slowly cooked in coconut milk and spices at precisely the right temperature until almost all the liquid is gone.  The slow cooking process allows the meat to absorb all the spices and to become tender.   The generous use of numerous spices makes rendang to have a complex and unique taste.

So, here it goes.......

The Recipe:

500g chicken, chopped (or mutton, beef, cubed)
3 potatoes, quartered
10 shallots
4 cloves garlic
2 stalks lemon grass/serai, smashed for flavour
1 cm ginger
1/2 tsp salt or to taste
sugar to taste
lots of pepper
1 tsp chili paste or 3 fresh chilies
1/2 tsp turmeric

1 cup coconut milk

2 kaffir lime leaves
1 turmeric leaf

1/4 cup oil

1/2 cup pounded kerisik (dry roasted dessicated coconut that is golden brown and very fragrant)


Method :-
1) Blend onion, garlic, ginger, salt, turmeric and chili paste until smooth.
2) Heat oil in wok and add blended mixture. Stir fry for 5 minutes or until paste separates from the oil.
3) Add chicken and potatoes.  Then, stir fry for 5 minutes.
4) Add kaffir lime leaves and turmeric leaf together with coconut milk and allow to simmer for about 45 minutes or until meat is tender, adding a bit more coconut milk as necessary to keep sauce from drying and burning.
5) Add the coconut kerisik when the meat is almost tender, like 10 minutes before finish.

Hope this recipe will fire your taste bud, just like how it did on mine!

Bon Appetite!


Saturday, July 13, 2013

Nyonya Pineapple Tarts, The Crispy Type

 
I started making pineapple tarts about 2 years ago.  Seriously, pineapple tart making is utterly labour-intensive and time-consuming.  Nevertheless, it is indeed a labour of love.  For those who have attempted making this Nyonya staple, you should know what I mean!

The work includes cutting the pineapples, removing all the eyes (gosh, I hate this the most), grating the fruits, slow-cooking it under low heat until it turns jammy (well, this itself takes about 1-2 hours), preparing the dough, assembling everything and finally baking the tarts.  I usually spend about 3-4 hours just on the assembling part and just to make a batch consisting of a mere 50 bite-sized pieces.

Well, I have to say that the whole family: my wife, my kids, including my in-laws really have a weakness for pineapple tarts.  However, as a matter of fact, not only that the price of a box (of tarts) sold outside is escalating like nobody's business but getting one that is nice and authentic is indeed hard to come by nowadays.  Hence, I feel it is high time that I get my hands dirty and learn to make my own.  Well, before getting down to business, I did my homework ie doing lots of reading from the net including seeking advice from my septuagenarian aunt (I affectionately call her Tuah Ee) whom we, among the relatives recognize her as the sifu of pineapple tart.  So, this could be the reason why when I made my very first batch of tarts, I did not encounter much hiccups and the outcome was fairly good and far from being disastrous.  I have made pineapple tarts for umpteen times and am now still fine-tuning it.

Basically, there are two types of pineapple tarts ie the hard crispy type and the soft melt-in-the mouth type, the latter being more preferable.  Actually, it all boils down to the pastry.  Personally, I prefer the hard crispy pastry.  I do not like it too hard though but most importantly, the pastry must be crissppy.  When you make a cross section to the tart, you can see layers forming the pastry.  This is what I mean......


Well, it all depends on the butter and the duration of baking.  To get this result, you must use the rub-in method.  While rubbing the butter with flour, it is important that you do not allow chance for the butter to melt.  That is the reason you need to work using your finger tips (as this is the coolest part of the hand) and everything needs to be done fast.  Secondly, you must never knead the dough.  Next, to make the pastry crispier, you just need to bake the pastry a little longer (about 5-10 minutes longer).

If you like the crispy type, nah....here you go :

Recipe
(this yields about 50 pcs depending on how thick is your pastry and the size of your pastry cutter)

A) For the pineapple jam:
        - 500g grated or chopped pineapple flesh (I always chopped)
        - 125g caster sugar
        - 125g rock sugar
        - 5 cloves
        - 2 cinnamon sticks

        Method
        1. In a heavy based saucepan, place the grated pineapple and spices and stir
            to dry the pineapple before adding the sugar.
        2. Once the sugar is added, reduce heat to low and stir regularly for about
            1 hour or until pineapple jam is relative dry. (remember that when you
            bake the tarts, the jam will further dry out)
        3. Make sure you stir it frequently as the bottom will burn easily.  Once it's
            thick and jammy, take it off the heat, remove the spices and allow to cool
            completely.
        4. Refrigerate for at least 1 hour or overnight.  This makes it easier for us to
            shape it into balls later.


B) For the pastry:
     - 500g plain flour
     - 300g unsalted butter (slightly softened)
     - 2 eggs
     - 1 tsp salt
     - 2 tbsp icing sugar
     - 1 egg yolk (for brushing over pastry to create golden hue)

      Method
      1. With your fingertips, rub together the flour and butter until it resembles
          bread crumbs.
      2. Add the egg and gently coax all the crumb until it binds together.
      3. Bring it together and shape it into a disc (remember, DO NOT knead)
      4. Wrap it in cling wrap and refrigerate for at least half an hour. 

C) The Assembling Process:
        1. Pre-roll the pineapple jam into small balls.
        2. Roll out the pastry dough to desired thickness.  Cut out dough using cutter.
            Arrange neatly onto the baking tray.
        3. Once you have arranged the tart shells on your tray, pop them into the
            pre-heated oven.  Bake at 175 degree Celsius for aboiut 10 minutes or until
            the shells are about to turn brown.  Note that at this point, the tart shells will
            expand.
        4. Take out from the oven and glaze the rims with egg wash.
        5. Place the pre-rolled pineapple jam balls onto the centre of each tart shell.
        6. Make a criss-cross pattern on the jam.  Then, glaze the patterns.
        7. Pop into the oven for the 2nd time.  Bake for another 10 minutes or until
            the tarts turn golden brown.


HAPPY TRYING!!