Saturday, July 13, 2013

Nyonya Pineapple Tarts, The Crispy Type

 
I started making pineapple tarts about 2 years ago.  Seriously, pineapple tart making is utterly labour-intensive and time-consuming.  Nevertheless, it is indeed a labour of love.  For those who have attempted making this Nyonya staple, you should know what I mean!

The work includes cutting the pineapples, removing all the eyes (gosh, I hate this the most), grating the fruits, slow-cooking it under low heat until it turns jammy (well, this itself takes about 1-2 hours), preparing the dough, assembling everything and finally baking the tarts.  I usually spend about 3-4 hours just on the assembling part and just to make a batch consisting of a mere 50 bite-sized pieces.

Well, I have to say that the whole family: my wife, my kids, including my in-laws really have a weakness for pineapple tarts.  However, as a matter of fact, not only that the price of a box (of tarts) sold outside is escalating like nobody's business but getting one that is nice and authentic is indeed hard to come by nowadays.  Hence, I feel it is high time that I get my hands dirty and learn to make my own.  Well, before getting down to business, I did my homework ie doing lots of reading from the net including seeking advice from my septuagenarian aunt (I affectionately call her Tuah Ee) whom we, among the relatives recognize her as the sifu of pineapple tart.  So, this could be the reason why when I made my very first batch of tarts, I did not encounter much hiccups and the outcome was fairly good and far from being disastrous.  I have made pineapple tarts for umpteen times and am now still fine-tuning it.

Basically, there are two types of pineapple tarts ie the hard crispy type and the soft melt-in-the mouth type, the latter being more preferable.  Actually, it all boils down to the pastry.  Personally, I prefer the hard crispy pastry.  I do not like it too hard though but most importantly, the pastry must be crissppy.  When you make a cross section to the tart, you can see layers forming the pastry.  This is what I mean......


Well, it all depends on the butter and the duration of baking.  To get this result, you must use the rub-in method.  While rubbing the butter with flour, it is important that you do not allow chance for the butter to melt.  That is the reason you need to work using your finger tips (as this is the coolest part of the hand) and everything needs to be done fast.  Secondly, you must never knead the dough.  Next, to make the pastry crispier, you just need to bake the pastry a little longer (about 5-10 minutes longer).

If you like the crispy type, nah....here you go :

Recipe
(this yields about 50 pcs depending on how thick is your pastry and the size of your pastry cutter)

A) For the pineapple jam:
        - 500g grated or chopped pineapple flesh (I always chopped)
        - 125g caster sugar
        - 125g rock sugar
        - 5 cloves
        - 2 cinnamon sticks

        Method
        1. In a heavy based saucepan, place the grated pineapple and spices and stir
            to dry the pineapple before adding the sugar.
        2. Once the sugar is added, reduce heat to low and stir regularly for about
            1 hour or until pineapple jam is relative dry. (remember that when you
            bake the tarts, the jam will further dry out)
        3. Make sure you stir it frequently as the bottom will burn easily.  Once it's
            thick and jammy, take it off the heat, remove the spices and allow to cool
            completely.
        4. Refrigerate for at least 1 hour or overnight.  This makes it easier for us to
            shape it into balls later.


B) For the pastry:
     - 500g plain flour
     - 300g unsalted butter (slightly softened)
     - 2 eggs
     - 1 tsp salt
     - 2 tbsp icing sugar
     - 1 egg yolk (for brushing over pastry to create golden hue)

      Method
      1. With your fingertips, rub together the flour and butter until it resembles
          bread crumbs.
      2. Add the egg and gently coax all the crumb until it binds together.
      3. Bring it together and shape it into a disc (remember, DO NOT knead)
      4. Wrap it in cling wrap and refrigerate for at least half an hour. 

C) The Assembling Process:
        1. Pre-roll the pineapple jam into small balls.
        2. Roll out the pastry dough to desired thickness.  Cut out dough using cutter.
            Arrange neatly onto the baking tray.
        3. Once you have arranged the tart shells on your tray, pop them into the
            pre-heated oven.  Bake at 175 degree Celsius for aboiut 10 minutes or until
            the shells are about to turn brown.  Note that at this point, the tart shells will
            expand.
        4. Take out from the oven and glaze the rims with egg wash.
        5. Place the pre-rolled pineapple jam balls onto the centre of each tart shell.
        6. Make a criss-cross pattern on the jam.  Then, glaze the patterns.
        7. Pop into the oven for the 2nd time.  Bake for another 10 minutes or until
            the tarts turn golden brown.


HAPPY TRYING!!

Wednesday, July 3, 2013

Roti John, the Melaka Style


I was watching a cook show, 5 Rencah 5 Rasa on Astro's AFC (Asian Food Channel) the other day and almost instantaneously, I got hooked to this recipe.  Looking at how the chef prepare the dish, it immediately brought me back down memory lane where how I used to take a forty-minute drive to Tanjung Kling (in Melaka) occasionally just for its Roti John and Ayam Golek.  It could be said that it was at this humble hut that I tried my first ever Roti John.  Instantly, I fell in love with it and till to-date no other Roti John's (though I have tried some other variations) could replace my stubborn little palate.   

Of course, this simple yummilicious local snack has that little something that has been drawing people there until today, but what it is.....only God knows!.......UNTIL one day,  I was browsing through this blog here that I finally knew that little secret, thanks to Wendy of Table for 2...or more.  Well, it was all about that fried ANCHOVIES!! This is THE ingredient that gives the roti john that extra kick and makes it so distinct that it has to be called - the Melaka style!! 

To put it simply, Roti John is essentially an omelette toast consisting of the sliced halves of an 11-12 inches long bread (similar to a French loaf) fried with a topping of minced mutton/chicken/sardin fish, sliced onions and scrambled eggs.  This dish is a popular Malay breakfast and snack item in Malaysia and Singapore.


Coming back to my version, well I used hot dog bread in replacement of the original long bread.  Reason? I can't seem to find any in town.

Ingredients:
(serves 4 pieces of hot dog bread)

Hot Dog Bread/long bread/French loaf
Oil for greasing

For the filling:
3-4 pcs canned Sardin fish + 1 tbsp of the ketchup
1 big onion, cut into slices
2 eggs, lightly beaten
1 red chillies, roughly chopped
2 tbsp anchovies, slightly blitzed after frying them till crispy
spring onion, roughly chopped 
cucumber, thinly sliced
1 dash white pepper

For the dipping sauce:
2 tbsp chillie sauce
2 tbsp hot water

Method :
1. Combine all the filling ingredients into a bowl.
2. Slice the bread into halves
3. Grease the frying pan generously with oil
4. Spread the filling mixture onto the bread and quickly place them
    onto the frying pan, with the filling side down. Remember to drain
    the liquid from the mixture before spreading onto the bun otherwise
    it will soak into bun making it soggy.
5. Let the bun sizzle for about 1-2 minutes or until it turns golden brown
6. Serve the buns with the chillie dipping sauce


1. Grease a baking tray with oil. Put into oven, on the lowest rack and preheat at 200C, bottom heat only.
2. Coarsely blitz anchovies and chilli. Combine with the rest of the filling ingredients.
3. Split the bun and spread the filling onto it. Top with some thin butter slices.
4. Place bun, filling side down into hot baking tray and bake until it smells good, about 5-7 minutes.
5. Slice roti john and serve with chilli dipping sauce. - See more at: http://wendyinkk.blogspot.com/2012/08/roti-john-mff-melaka-4.html#sthash.oNWApUmh.dpuf
1. Grease a baking tray with oil. Put into oven, on the lowest rack and preheat at 200C, bottom heat only.
2. Coarsely blitz anchovies and chilli. Combine with the rest of the filling ingredients.
3. Split the bun and spread the filling onto it. Top with some thin butter slices.
4. Place bun, filling side down into hot baking tray and bake until it smells good, about 5-7 minutes.
5. Slice roti john and serve with chilli dipping sauce. - See more at: http://wendyinkk.blogspot.com/2012/08/roti-john-mff-melaka-4.html#sthash.oNWApUmh.dpuf
1. Grease a baking tray with oil. Put into oven, on the lowest rack and preheat at 200C, bottom heat only.
2. Coarsely blitz anchovies and chilli. Combine with the rest of the filling ingredients.
3. Split the bun and spread the filling onto it. Top with some thin butter slices.
4. Place bun, filling side down into hot baking tray and bake until it smells good, about 5-7 minutes.
5. Slice roti john and serve with chilli dipping sauce. - See more at: http://wendyinkk.blogspot.com/2012/08/roti-john-mff-melaka-4.html#sthash.oNWApUmh.dpuf

Thursday, June 20, 2013

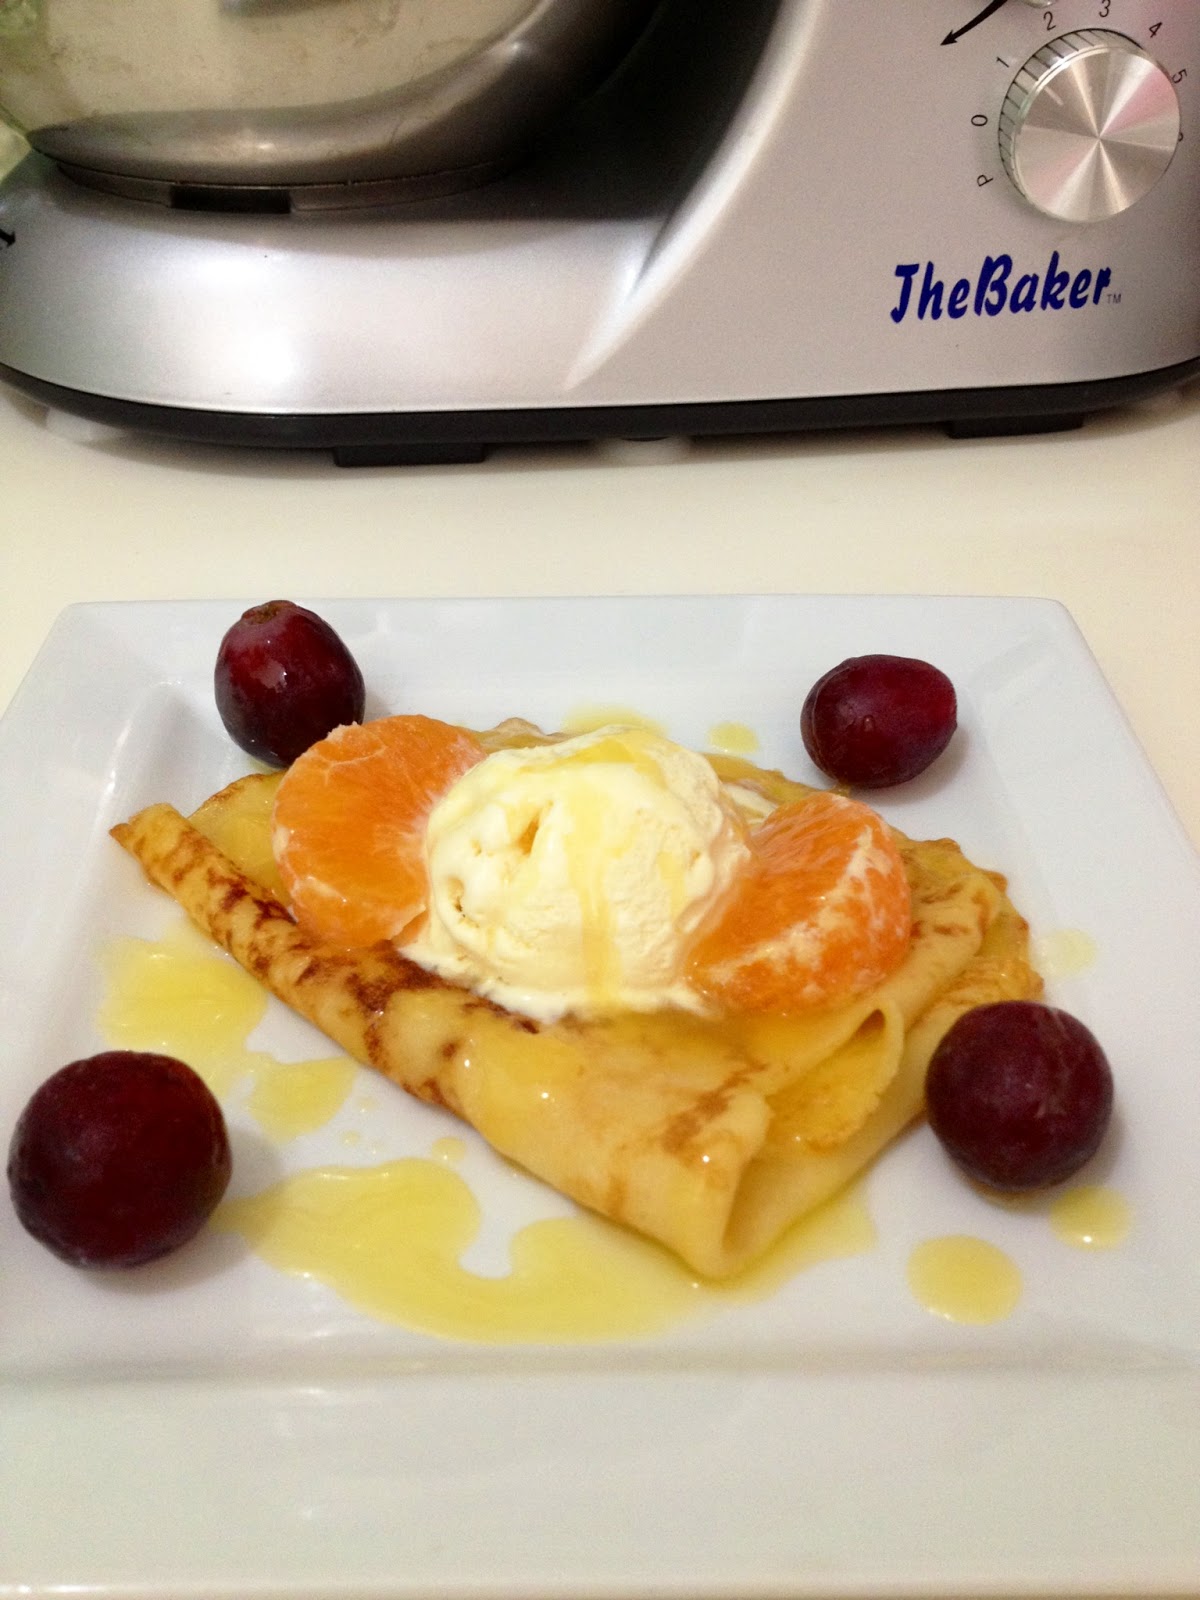
Ice-cream Crepe With Orange Sauce


I first made this delectable dessert during this year's Chinese New Year (CNY).  Since both my kids loved eating crepe cakes and.....since, there was some leftover ice-cream in the freezer that had been lying there for months, why not make something out of the twos.  After all, it's going to be CNY and as in every year, I would normally have to crack my head thinking of something fast, simple yet 'special' to serve my guests.

So, off I went googling around and soon realized that there were loads of recipes on crepes with ice-cream.  Almost all the ice-cream crepe recipes were accompanied with a sauce and for that I deliberately chose orange for I was sure the sauce would further spice up the new-year mood.  More so, I always believe that we can never go wrong with orange and vanilla and they will always be a good blend. So, for the ice-cream, it was undeniably vanilla. 

To be certain of this simple arrangement, my kids (as it is always the case) were called to play guinea pigs for me.  Looking at how they scrambled and bickered just to grab that one miserable piece and it ended with my four-year-old girl bawling one the floor, totally 'defeated', I was assured that this humble treat would receive a favorable thumbs up.     

True enough, friends and relatives who tried this dessert delightfully like it.  So, here I come whipping this recipe for the second time.  But this time round, it is on Father's Day!

The Recipe:

A) For The Crepe Batter (yields 6-8 pcs of crepe):
     3  tbsp butter
     1 1/2 cups fresh milk
     3/4 cup all-purpose flour
     3  eggs
     3  tbsp sugar
     pinch of salt
     vegetable oil

      Method:
      - Cook butter until hazelnut brown
      - heat milk until steaming.  Then, cool for 10 minutes
      - beat eggs, flour, sugar and salt, on medium speed
      - slowly add hot milk and browned butter into the mixture
      - refrigerate overnight

      - the following day, heat the frying pan, brushing the surface with some oil
      - once it is hot, scoop 1/4 cup of the batter into the pan, give it a nice swirl to form a
        paper thin layer of crepe
      - after about 40 sec, overturn the crepe and cook the other side for a further 40 sec

 B) For The Orange Sauce:
      1 cup orange juice
      1 tbsp butter
      1 tbsp milk
      1 tbsp plain flour
      6 tbsp sugar
      zest of 1 orange

      Method:
      - Mix the all the ingredients in a small saucepan.
      - Simmer the juice mixture over medium heat, stirring occasionally, for about
        10 minutes, until a thick, syrupy sauce is formed. 
      - set it to cool and it is now ready for drizzle


 HAPPY TRYING!!

Thursday, June 13, 2013

Moist Chocolate Cake

For those who crave for chocolate cakes, I strongly feel that this recipe is worth a keeper.  I found it in one of the leading food magazine in Malaysia - Flavours. Well, it was back in 2009 when I gave a shot making my first ever chocolate cake.

By some strokes of luck, surprisingly, I managed to find my way and pull it through.  There it was, a good-looking, soft, fluffy, moist, dark-colored 'thing' standing elegantly on my white ceramic dessert plate.  For days, the cake accompanied me, satisfying my taste buds when I was alone resting leisurely on my couch in front of the telly enjoying my evenings.  

Then, disaster struck when I found out that I had misplaced my magazine.  After a futile search, I caught hold of my maid and made a baseless accusation that she must have mistakenly placed it somewhere in the piles of old newspapers which I had just sold them for recycling.  Arrggh!

I tried to search through the net for another similar ones but in vain.  Finally, I gave up and somehow managed to come to terms with the loss.


Approximately three weeks ago, my eleven-year-old boy, Bryan came running to me saying that he had found the magazine, hidden under the drawer of the coffee table. Thank God! Phew!

Barely a week after my rekindling with the magazine, I whipped out another cake and the following week, another one.  Well,  two in a row is definitely enough and it could turn out to be a bit cloying eating it every day.  So, I thought it is high time that I share it out here especially for those chocolate cake lovers who want to try your hands at making one yourself.  Trust me, your can't go wrong with it!

One thing I like about this recipe is that it calls for coffee powder in both its cake and icing, giving it a tinge of bitterness and making the whole cake taste flavourful.

This recipe is shared by Arlene Diego, who teaches cake baking and Filipino cuisine in Damansara Jaya.  The cake is based on the American Chocolate Cake, made popular in the Klang Valley by the La Manila Cake House in the 80s.

                                                                      Arlene Diego

The Recipe:

Chocolate cake
330ml   fresh milk or water
60g       cocoa powder
1 tsp     vanilla extract
1 tbsp   instant coffee powder
180g     butter, softened
330g     caster sugar
3           eggs, grade B
190g     superfine flour, sifted
1 tsp     bicarbonate of soda, sifted
2 tsp     baking powder, sifted

Chocolate icing
700ml   fresh milk
300ml   condensed milk
2 tbsp    instant coffee powder
2 tsp     vanilla extract
85g       cocoa powder, sifted
6 tbsp   all-purpose flour, sifted
3 tbsp   cornflour, sifted
3 tbsp     cold butter


To prepare cake:
Preheat oven to 180 degree Celsius.
Line two 9" round cake pans with parchment paper.
In a bowl, combine milk, cocoa powder, vanilla and coffee.  Mix and set aside.

In a stand mixer, cream butter and sugar together on medium speed until light and fluffy.
Add eggs one at a time, beating to combine

Add sifted mixture alternately with the liquid mixture,  beginning and ending with flour.
beat until smooth, scraping down the sides of the bowl.

Divide batter equally among the prepared pans.
Bake for 18-20 minutes. Remove from oven and cool completely in the pan.

To prepare the chocolate icing:
In a heavy-based saucepan, place all the ingredients except the butter.
Cook over medium heat, whisking continuously until smooth and thick.
Add butter, stir to combine.
Remove from heat and set aside to cool completely.

To spread icing: 

Remove the cake from the pans.
Spread a layer of the cake evenly with half the chocolate icing, top with the remaining layer of the cake.
Spread top and sides of cake with remaining chocolate icing.
Use a cake comb or fork to form a decorative pattern.


HAPPY TRYING!!

Wednesday, June 12, 2013

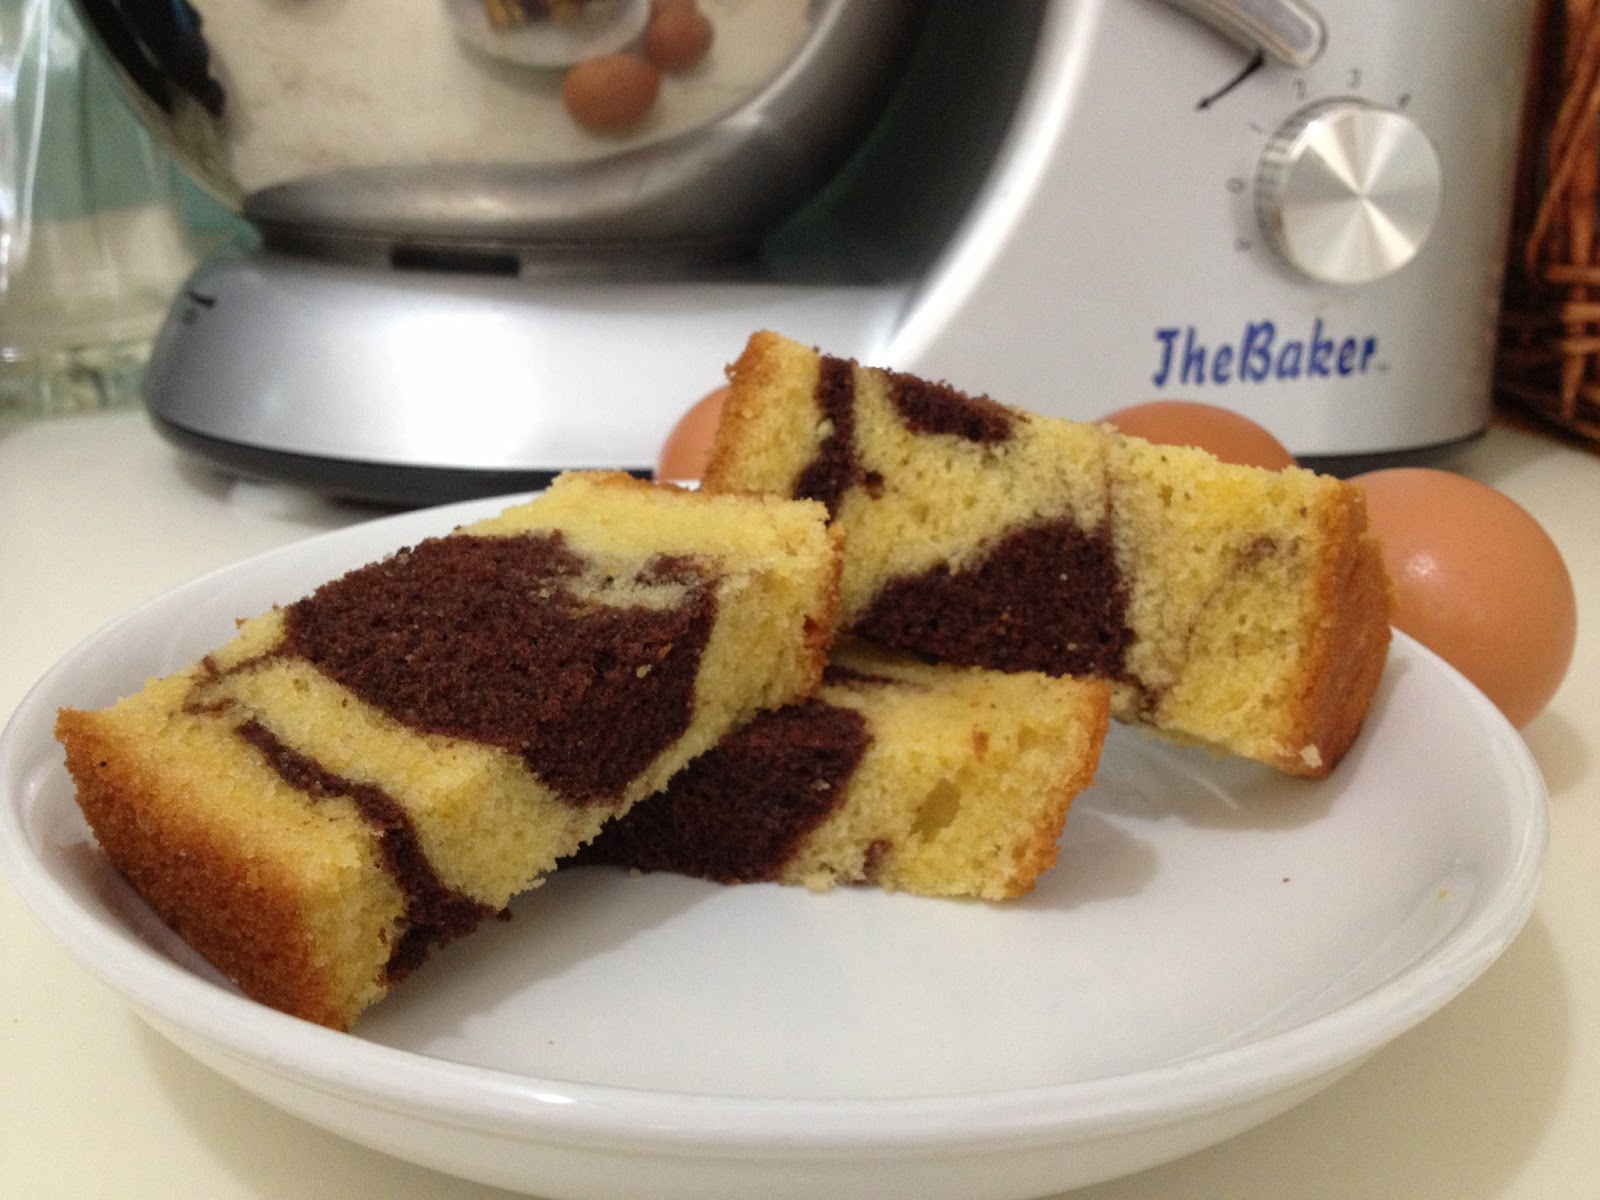
Old-fashioned Marble Cake

People often say that to be a good baker or rather to start baking, firstly one needs to at least know how to bake the very basic cake - a classic butter cake.  If you fail at this, then forget about baking!  Well, I have been baking for the past two years and sadly to say I am still struggling to get the hang of it.  Nonetheless, one thing for sure, it's definitely not the time yet for me to wave the white flag.

I have attempted baking about 5-6 rounds of this cake and of course using different types of recipes, different types of mixing methods but each time they come out of the oven, disappointments just surge in - either the top of the cake is unusually domed and badly cracked, the texture is rough and hard or the whole thing turns out too dry.  Basically, what am I looking for in a butter cake? Well, a good butter cake (to me) should have :

1. a flat top
2. the texture is fine and velvety soft
3. moist but not dense
4. the outer layer is not burnt
5. the smell emanates and invades into your neighbours' house,

and most importantly,

6. friends or relatives who try the cake must come back to you begging for the recipe!

Well, after browsing through looking for THE butter cake, I finally stumbled upon this one.  What caught my eyes was the photo of the cake with its soft fine texture sturdily standing on the plate.  Another thing that set my eyes on it and put this recipe on my 'must-bake' list is the mixing method used.     

So, here I am, giving this cake another shot!

The Recipe
(adapted from  www.thelittleteochew.com)

- 8 large eggs, separated
- 9 ozs (255g) castor sugar
- 12 ozs (340g) unsalted butter, softened
- 9 ozs (255g) all purpose flour
- 1 1/2 tsps baking powder
- 1 1/2 tsps pure vanilla extract
- 2 tbsps good quality cocoa powder
- 1/4 tsp salt

1. Preheat oven at 160°C (convection fan on) with a wire rack in the middle. Line an 8-inch round cake tin with parchment, butter and flour. Sift flour, baking powder and salt in a bowl. Set aside.

2. Cream butter in the bowl of a stand mixer fitted with the paddle attachment till light and fluffy. In a separate bowl, whisk the egg yolks with the sugar till light. Gradually add this into the butter and beat on medium speed till just incorporated. In a separate bowl, whisk the egg whites till stiff peaks form. With a spatula, fold in the meringue into the egg yolk mixture in 3-4 batches*. Add in the dry ingredients gradually until just incorporated.
* The first time I added the egg whites, it was impossible to fold. What I did was just mix it up with the thick yolk batter and "loosen up" the batter. The subsequent batches were much easier. I folded the whites in 3 batches.

3. Scoop out 1/4* of the batter in a separate bowl. Sieve cocoa powder over it and fold to mix well. Pour batters into tin, alternating between the two mixtures. Start with the yellow batter and end with the cocoa mixture. Rap pan on counter several times to eliminate air bubbles. With a long skewer, swirl (sparingly) around the batter to create the marble effect. Bake for 40-55 minutes or until a tester inserted into the middle of the cake comes out clean.
* This is somewhat arbitrary. A little more won't hurt, especially if you want a bit more chocolate in your cake! :)


Saturday, December 11, 2010

Ayam Buah Keluak

Slurppppp......ahhhh! Burrrrp!
After licking all my five fingers, I must agree this is perhaps one of the best meal I have ever had after sooo sooo long! 

Last Sunday, I decided to cook one of my favourite typical Nyonya dishes - Ayam Buah Keluak! Since nya passed away, I hardly had the chance to relish this finger-licking dish. As my wife is not a Straits born, so I thought it's time for me to get my hands down and learn to cook this Peranakan dish myself.

Well, what is a 'buah keluak'? Basically, buah keluak is a black nut from Indonesia about the size of a misshapen golf ball.


As a matter of fact, it is a very poisonous nut and amazingly we Asians use it as our cooking ingredient.  But not to worry as the ones found in the market have been detoxificated. It is boiled for hours and buried in the soil for over 40 days. Amazing yah, so poisonous and yet so edible! Well, like durians, this typical nut is an acquired taste. You either hate it or love it.

Now, how do we eat it? Firstly, a slit has to be made at the 'mouth' of the nut after which we scrape out its contents. It's basically a tar-like paste and the taste is unique and unbelievable. You just need to taste to believe it. Apparently, the supply is rather scarce as not many places sell them. For those who are staying in Malacca, I bought them from the Bukit Cina market and are sold at RM14 for a mere 20 pcs.

So, how do we cook this delectable dish?

First, the ingredients:

A: 15-20 pcs of buah keluak

B: 1/2 chicken

C:
6 red chillies
15 shallots
5 cloves of garlic
2 cm of galangal (lengkuas)
2 cm of tumeric (kunyit)
6 pcs of candlenuts (buah keras)
3 cm of ginger (halia)
1 tbsp of shrimp paste (belancan)

D: 3 stalks of lemon grass (serai), coarsed.

E: 4 tablespoons of tamarind paste, soaked in 1 litre of water and strained.

F: sugar & salt to taste


Second, the steps. Well, I would divide the whole process into 3 parts :

1) Soaking & cracking
As the nuts are poisonous in nature, it is necessary to soak them for at least 1 night. It is also to remove the layer of soil on the nuts. However, according to old people, they believe that the longer the nuts are soaked, the softer the contents we get .


After soaking, we need to make a small opening on the nuts. And this makes your heart pumps a little especially for the first timer like me. It can be dangerous as we need to use the end of the chopper to carefully crack open the mouth of the nut.

2) 'Pasting'
This process is basically to make the paste. In a blender, blend all the 'C' ingredients until fine.

3) Cooking/Simmering
With 4 tablespoons of cooking oil, stir fry the paste together with the lemon grass until fragrant.


Add in the chicken and keluak nuts.


Lastly, add in the tamarind juice.

Simmer for about 1/2 hour or until chicken is tender.

And the final outcome is

taaaadaaaa................


Well, that's about all. The dish is ready to be savoured. However, if you are cooking for your guest or to get a better taste, an excellent tip I got is be sure you cook the dish the night before. This allows the flavour especially from the keluak paste to soak into the chicken and the taste........voila!

Monday, October 26, 2009

My Little Chocolate

In the month of October 2002 I was given a box of chocolate and in that particular box was a beautiful little chocolate nestled snugly in its compartment waiting for me to 'embrace'. Little did I realize that this little 'chocolate' had made my days, showering me with lots of surprises, joys and hopes.


Seven years later, I asked for another box and on the 10th of October 2009 the box came knocking at my doorstep. The only difference now is that the little chocolate inside was a female one and Caitlyn I have named her. What makes it even sweeter is that both the chocolates came to me on the same date - 10/10......Aahhhh! What else can I ask for?

Now, let me take you through the journey how my precious little princess arrives.....


Wife waiting to be admitted


Waiting to be pushed into operating theatre


In the changing room waiting to be called in to witness the operation